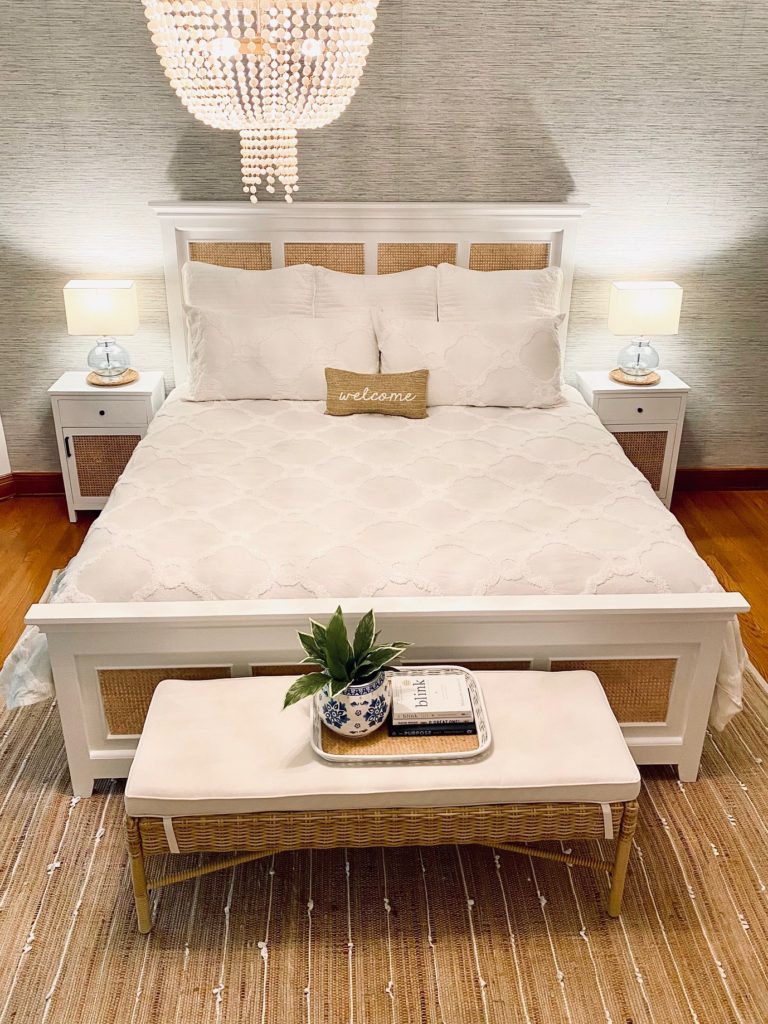
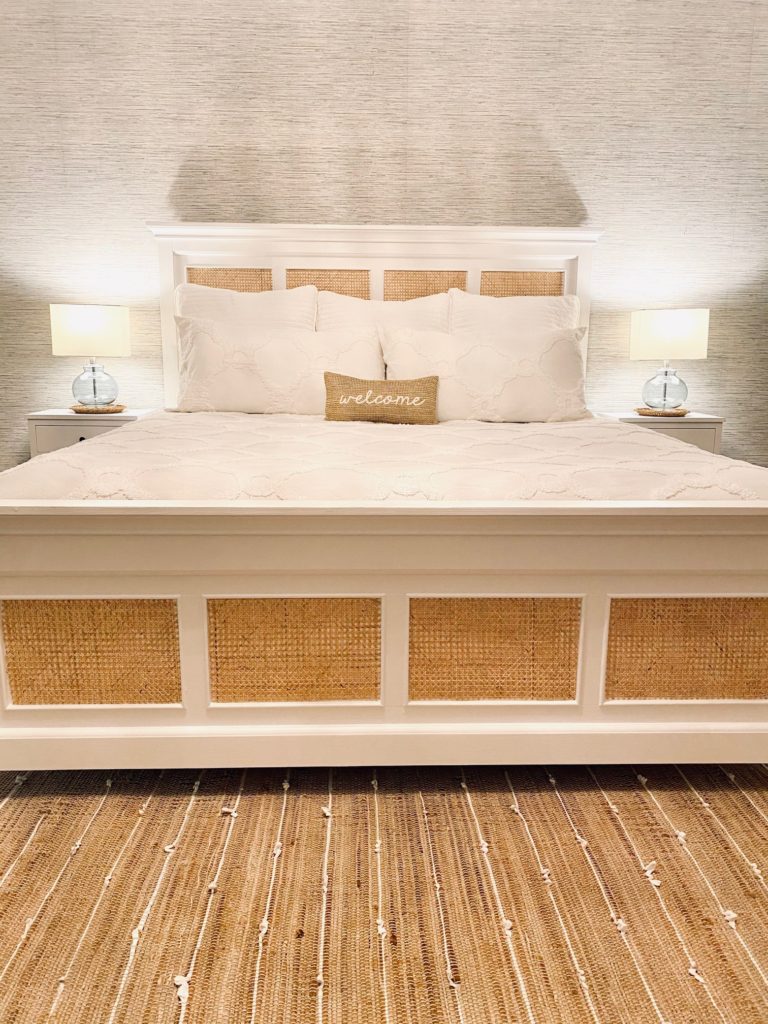
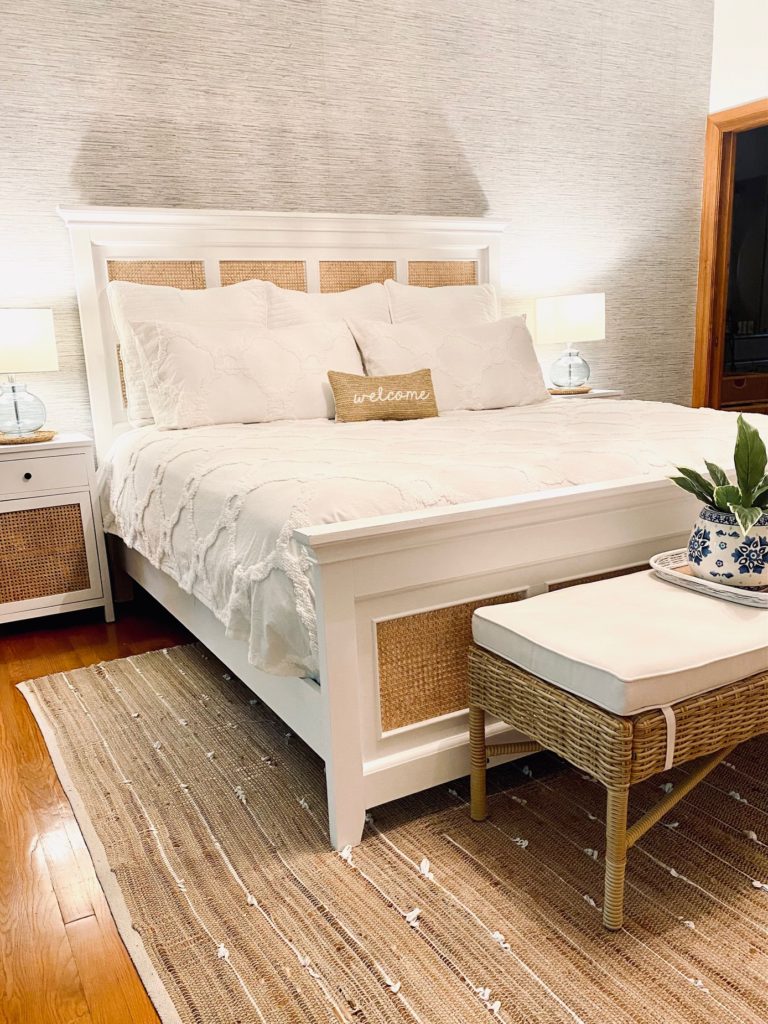
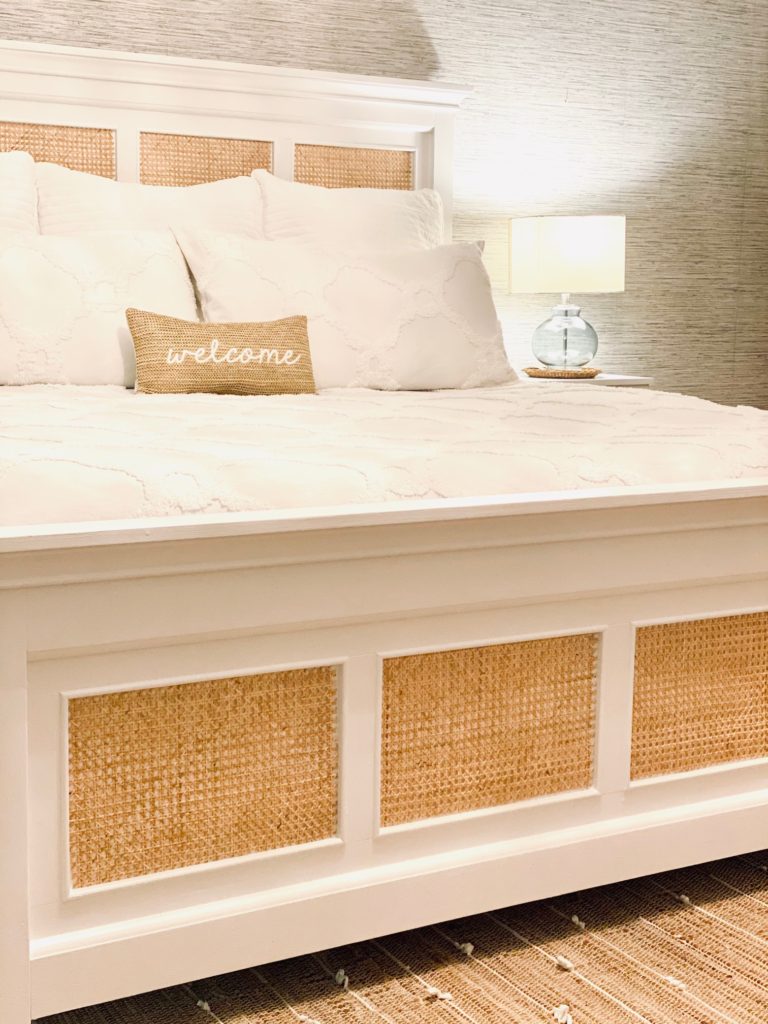
The May 2021 Serena & Lily magazine was just delivered. In it, the Harbour Cane bed of my dreams. A traditional bed frame with a modern twist of cane inlay. Along with the awesome bed comes an awesome price tag. A whopping 3K for the king size bed head and foot board. It’s not the first time and it certainly won’t be the last that I’m inspired to create a copy cat version of a high end piece of furniture or decor that catches my eye. This weekend I decided to update and refresh my existing king size head and footboard into a dupe of the S&L bed of my dreams and it came out way better than I ever imagined! Here is my white and cane bed DIY project that took me 3 days to complete and less than 6 hours total time to finish. BTW – total cost for the bed update was under $300!
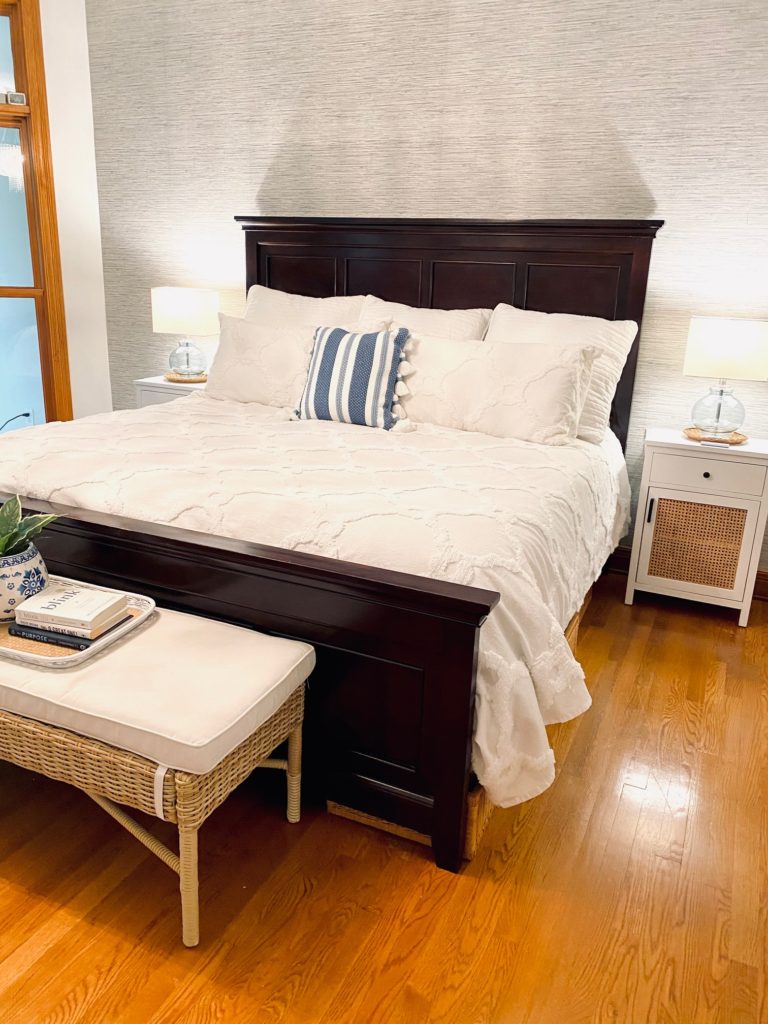
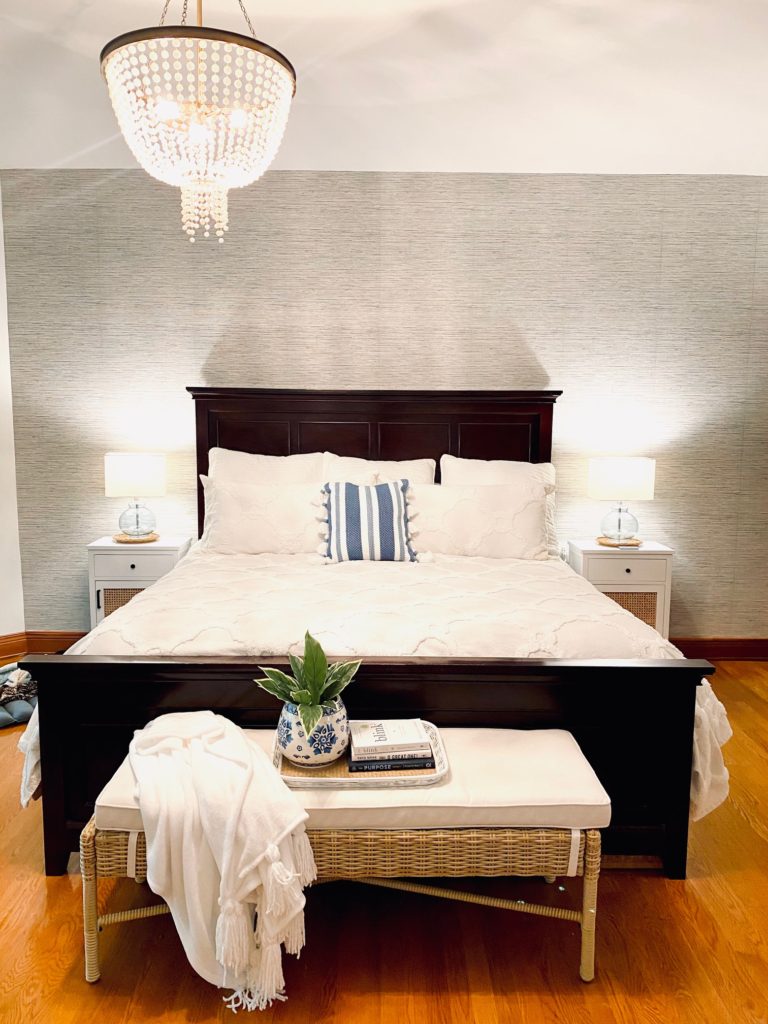
Absolutley nothing wrong with the existing bed frame other than it was too dark for my bedroom.
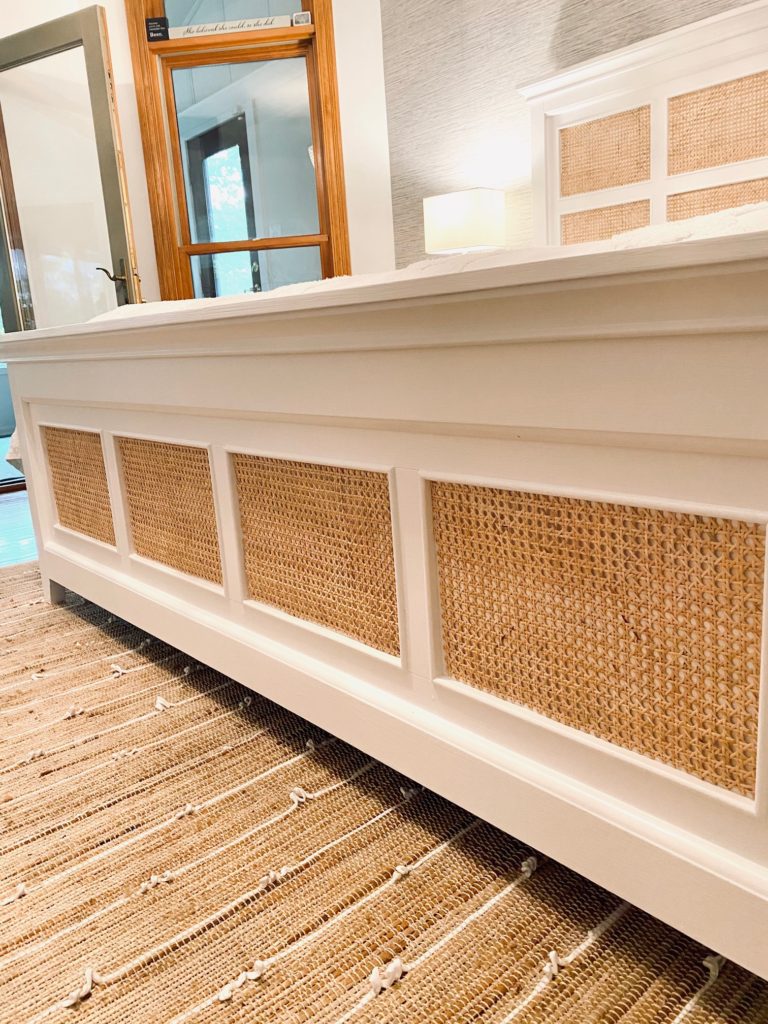
The inspiration for the white and cane bed DIY was this king size bed from Serena & Lily that costs a whopping $3,000! My dupe cost less than $300!!
Time & material
Total time working on the bed update was 6-7 hours. I split the work up between three days and worked on it intermittently throughout the weekend. Since the bed I was updating was expresso brown and my dream bed is white, the first step was painting the entire bed. After painting, I applied cane (cut to size) to the picture frame window boxes that existed on the bed frame. All in all, the steps to achieve a copy cat of my dream bed was very simple and not time consuming. The worst part of the entire project was not having a bed to sleep in at night and having to sleep in the basement for three nights!
Sanding
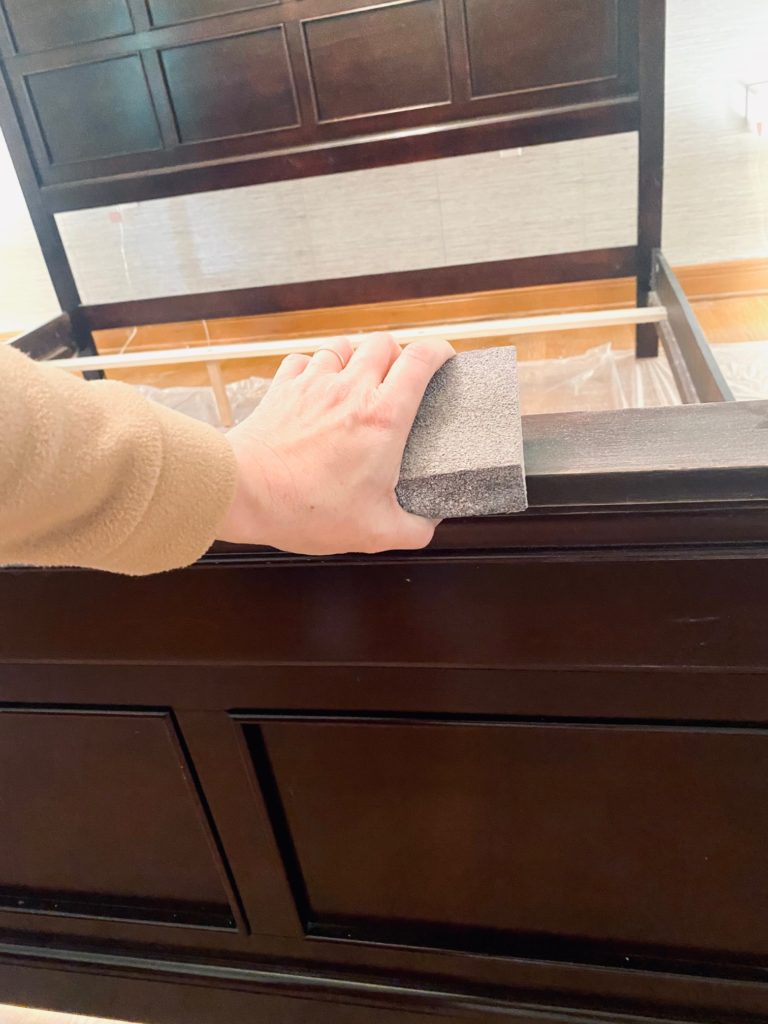
I always sand furniture I’m going to paint first. Whether a paint is guaranteed to cover or not I always prep any wood furniture I’m paining by sanding first. Heavy duty sanding is not necessary nor is an electric sanders or lots of muscle. I use an 80 grit block sander and scuff up the entire surface I am planning to paint by hand. Once completely sanded and scuffed I wipe the entire surface clean with a wet rag to pick up any loose dust and dirt.
Primer
Once sanded and wiped clean I put on a single coat of primer. The product that I use and works great for many of these jobs is PPG Gripper. It is an acrylic paint primer for interior or exterior surfaces. It is stain blocking and works on wood, metal, siding, plaster and masonry. One gallon of Gripper primer will run around $26. It claims to even bond to a glossy surface (which makes sanding furniture not a necessary step but I still sand surfaces since it’s not hard or time consuming so I just do it). Also, since this is a first primer coat I apply it quickly with no regard to brush strokes or evenness. I just get a coat on there and since two additional paint coats are next, I don’t care what it looks like going on.
Primer coat is applied quickly and without concern for evenness.
Paint
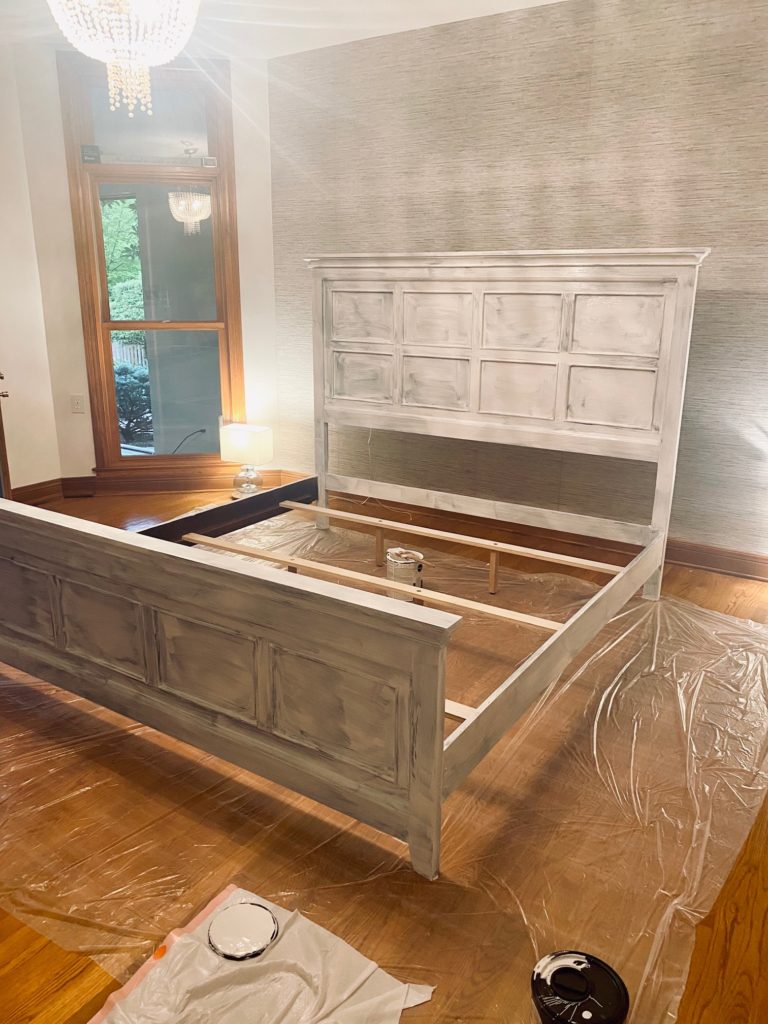
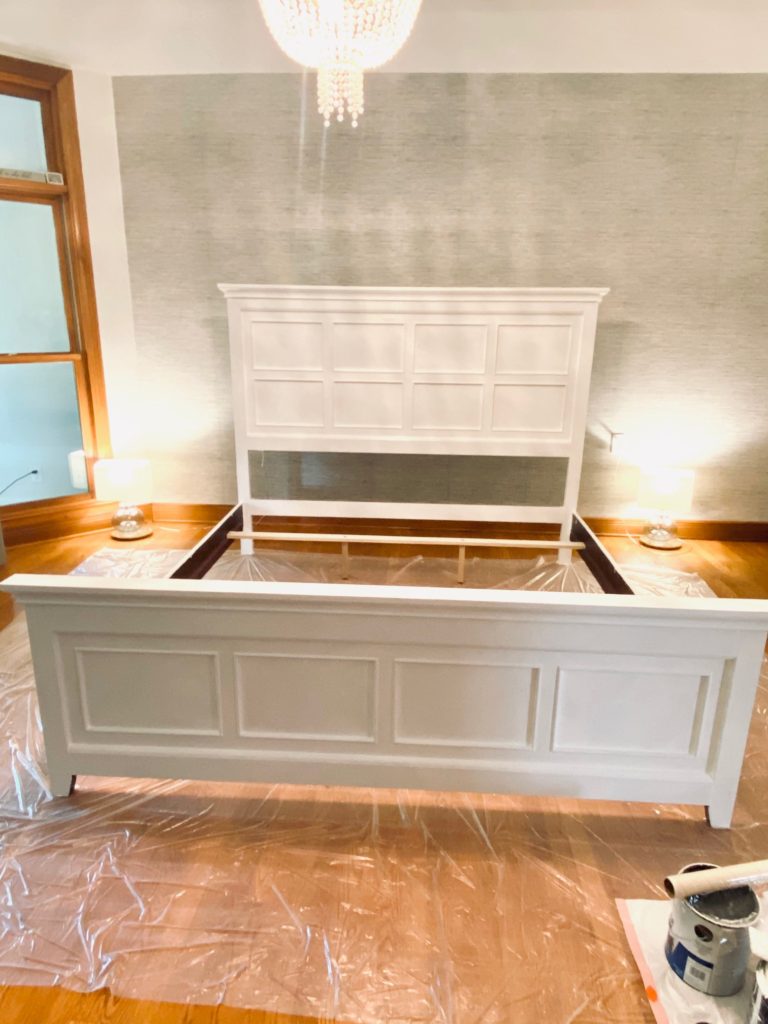
Once the Gripper primer coat is dry (I sanded and painted one primer coat on the 1st night and let dry overnight) then I apply a coat of paint (tinted to the color of choice – for this project I painted my bedroom furniture BEHR White 52). The product I use for painting wood furniture is the BEHR Ultra Scuff Defense paint & primer in one. Yes, I’m fully aware of the double primer usage of my paint choices. As I mentioned earlier, I’ve painted so many pieces of furniture over the years. I’ve learned from my mistakes (I’ve spent hours painting just to have it ALL peel off a day later because I missed a step or used products that didn’t work or in the wrong order). Just as sanding is probably not necessary with these products, neither is doubling down on the primer BUT this is what works for me and once I started using these products and follow these steps I’ve never had a problem with the outcome of my furniture paint projects. This isn’t what you should do as much as it’s just what I do! A gallon of Scuff Defense runs around $18. I also always paint my furniture (and walls) in satin finish in my home.
Already the bed looks so much better after primer and one coat of paint. I applied a 2nd coat of paint for full coverage.
Cane
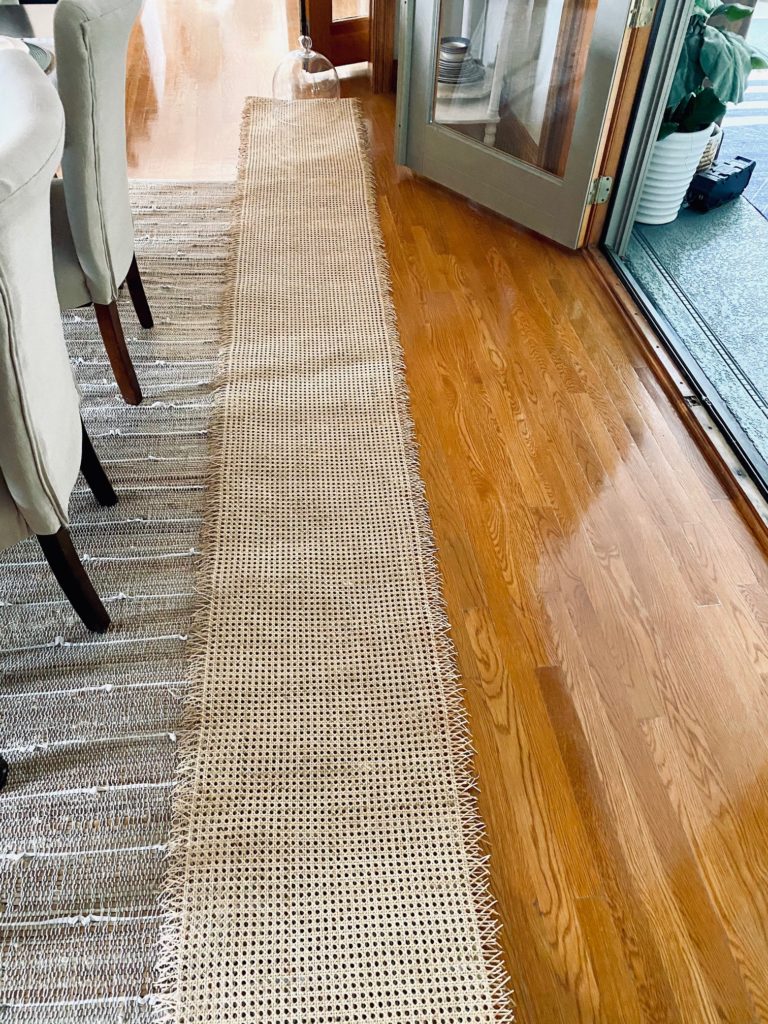
After paint is completely dry (so far in the project I painted 1 coat of PPG Gripper primer and 2 coats of Behr Scuff Defense in my color of choice White 52) it’s time for the cane! I call it cane, some call it rattan or wicker. I’ve been sneaking this material into many aspects of my home design, furniture and décor. I love it because it matches great with my honey oak floors and trim. It has a light and airy feel to it plus its a natural material that is sustainable and eco-friendly! The downside, it’s a little pricey at $15-$25 per foot. I scoured the internet and found it on Amazon HERE but ultimately found the best price on Etsy for $15.25 per foot HERE. For my project I ordered 13 feet and with shipping and tax I spent a total of $240 on the cane. I was extremely happy with the quality of the cane webbing I received.
I ordered 13 feet of cane webbing for my white and cane bed DIY project. Since it shipped rolled I unrolled it to flatten it out a couple days before I started the project to make it easier to work with.
I ordered 13 feet of cane webbing for my white and cane bed DIY project. Since it shipped rolled I unrolled it to flatten it out a couple days before I started the project to make it easier to work with.
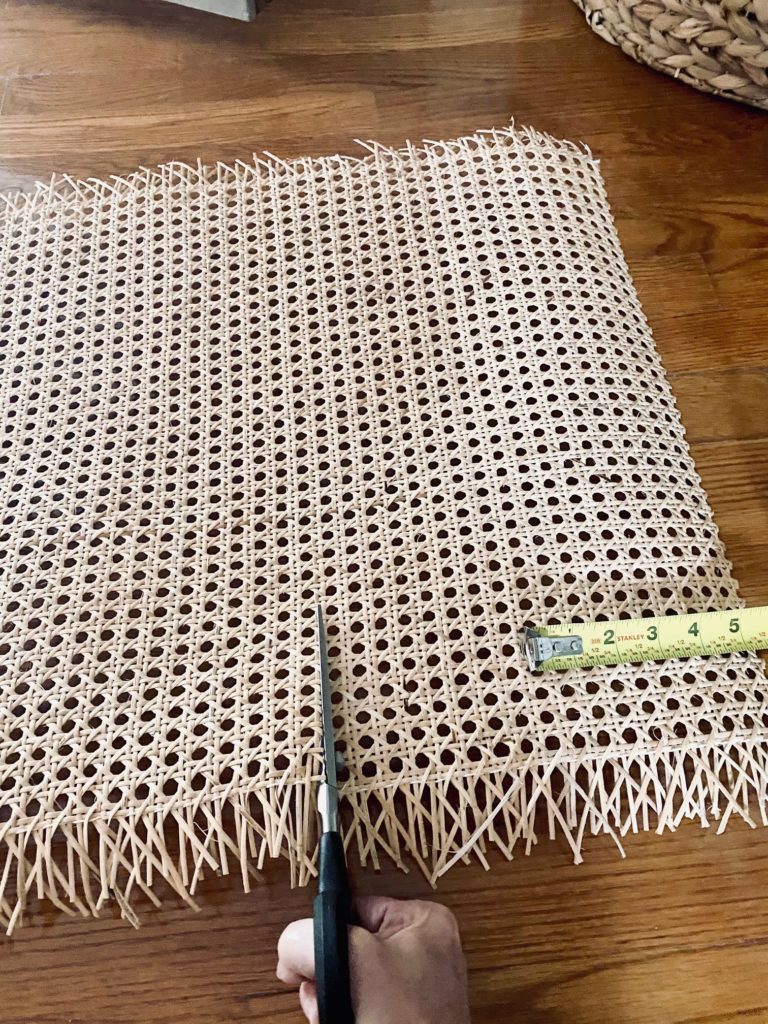
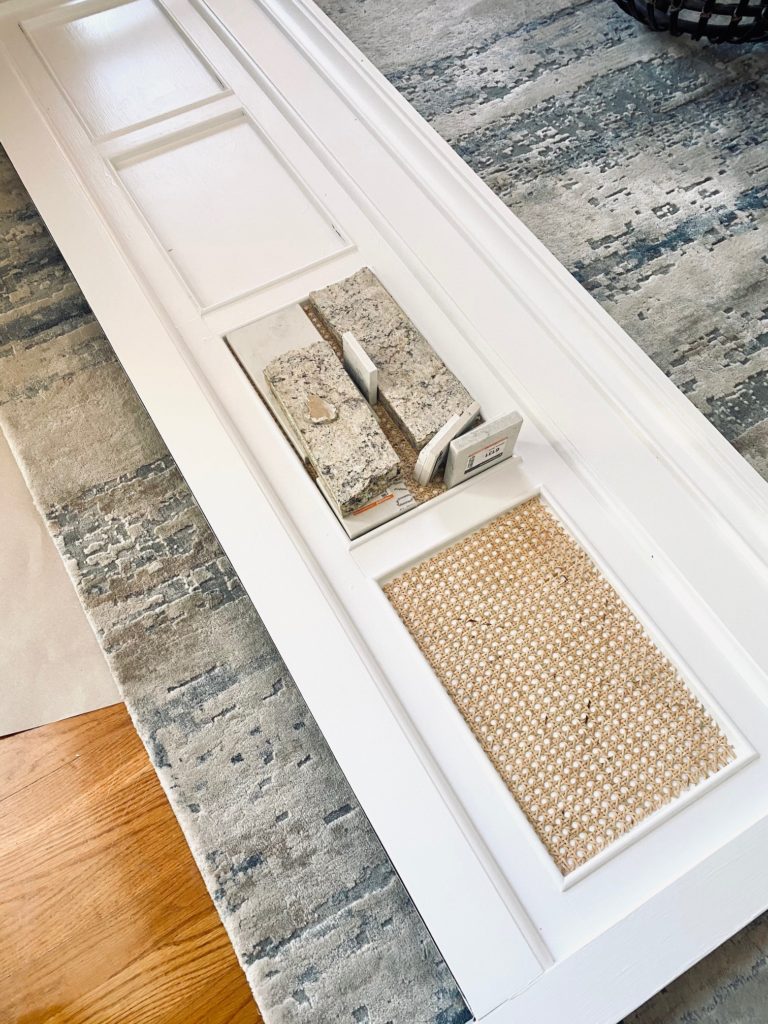
The first step with the cane webbing was to cut each piece to size to fit the areas on the head and foot board where I was placing them. I had 12 total squares on the headboard where I wanted to place the cane webbing. Each square was the same size so I made a template for myself and cut 12 pieces from the roll.
IMPORTANT: Since the cane is a natural substance each piece varied a bit. Therefore, before gluing I made sure that each was cut specifically to fit the area I was placing it. It was slightly tedius but I’m very picky!
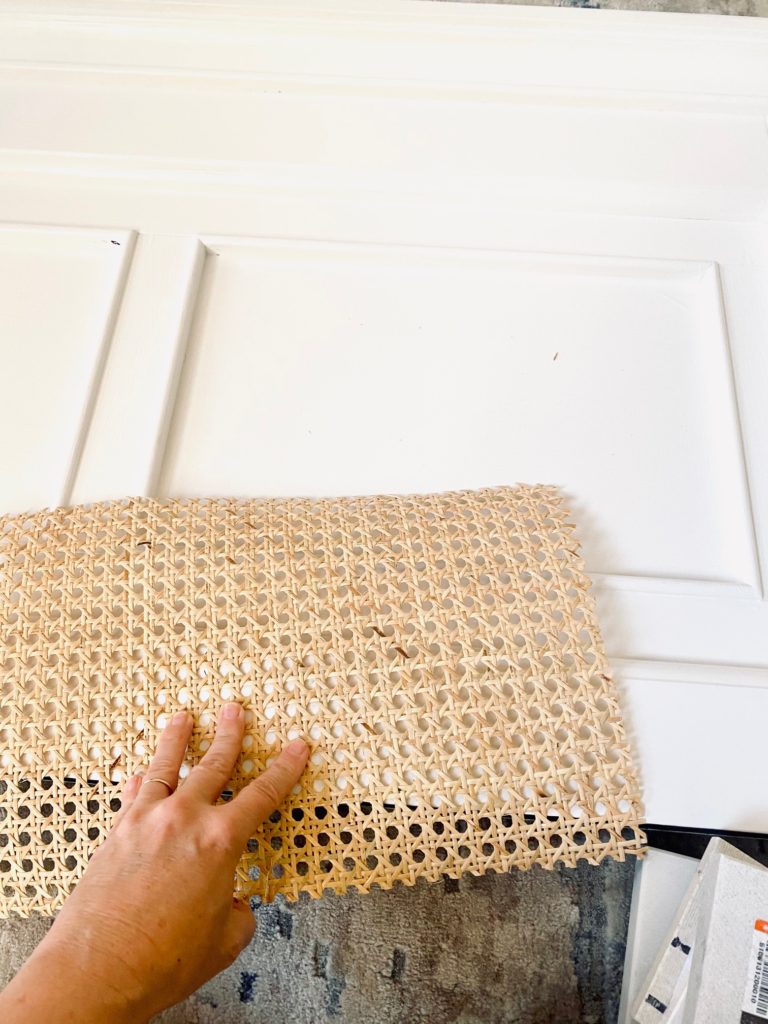
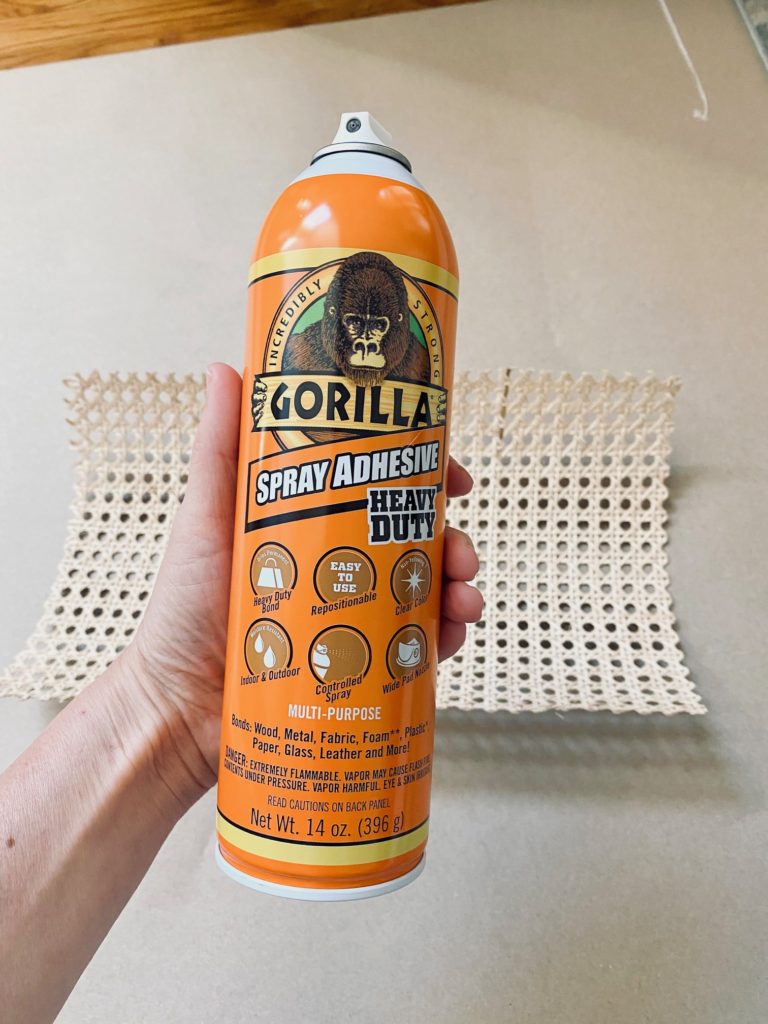
I tried a couple other glue options but this GORILLA spray adhesive heavy duty was by far the best product for this particular job. Once I had the exact size to fit the bed frame square I took the glue and cane outside and generously sprayed the backside of the cane. Brought it back inside and placed it on the head or footboard.
I ended up taking the bed frame apart so I could apply the cane webbing. After spraying the backside of the cane webbing with glue I placed the webbing on the square I was working and placed granite scraps on top of the cane (very heavy) for weight until the glue dried. The granite pieces worked great because they did not stick to the glue and were very heavy. I repeated this for all the squares on the foot board and head board.
I moved the granite pieces often to apply even pressure and if there were any areas that didn't lay down I sprayed more glue over the cane (it dries clear) and put extra weight on it until it adhered.
Here you can see all the steps of putting down the case. Pieces are cut to size, glued and weighted. I let the glue dry overnight before reassembling the bed.
UPDATE ON THE GLUE!
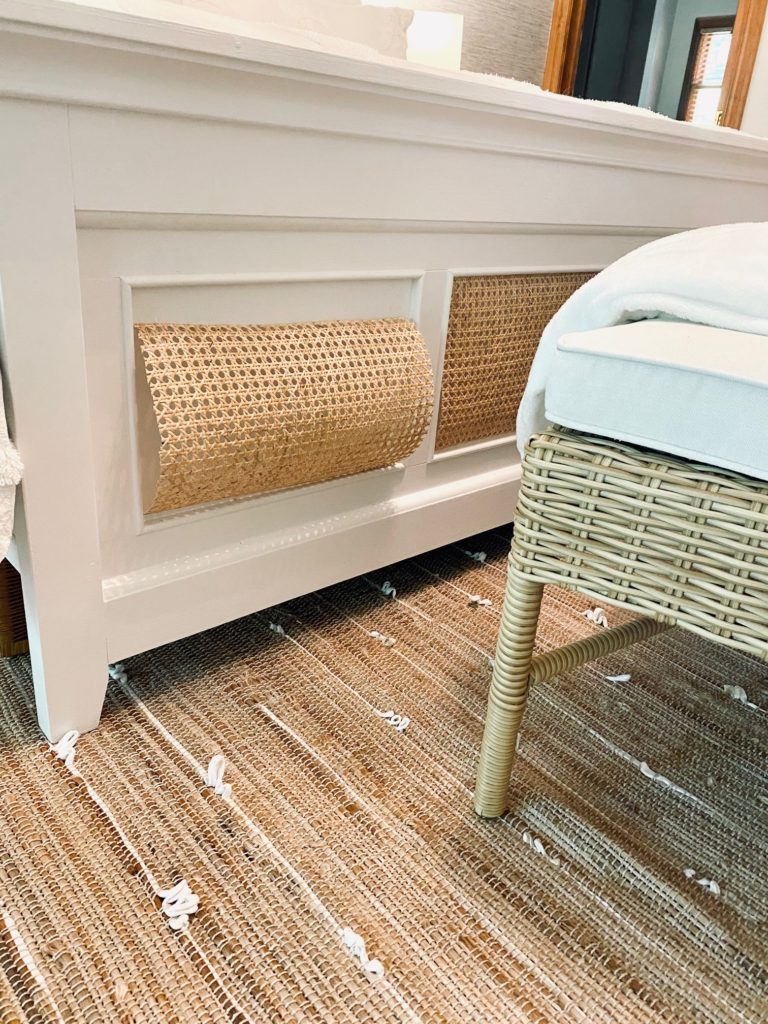
Within a week the cane started to peel and eventually completely fell off the bed. So, in hindsight, only using glue was NOT the best solution. I should have reinforced the glue with staples. I used my hand held staple gun (with 3/8″ staples) and reinforced the cane pieces by stapling them to the headboard. This work beautifully.