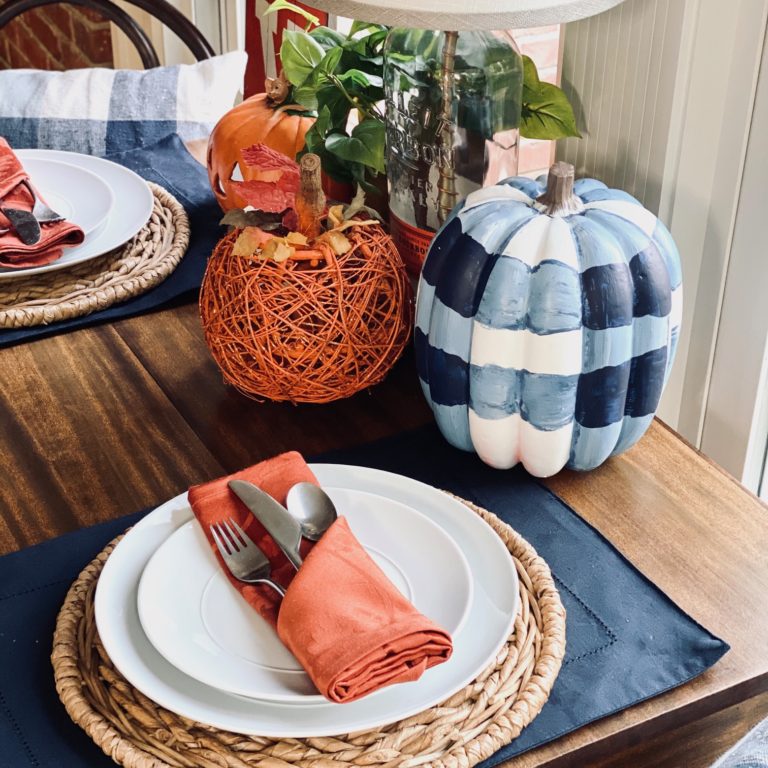
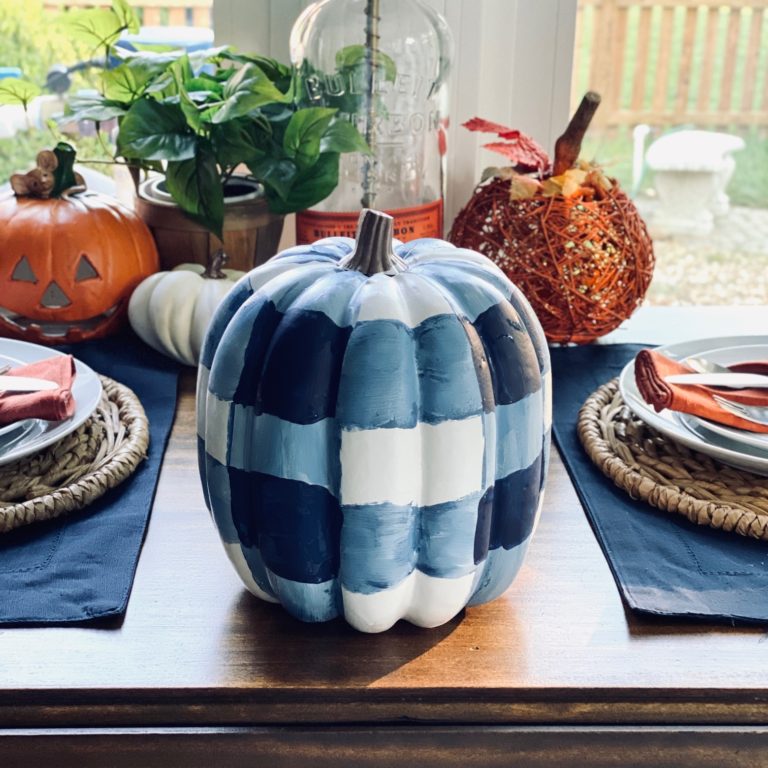
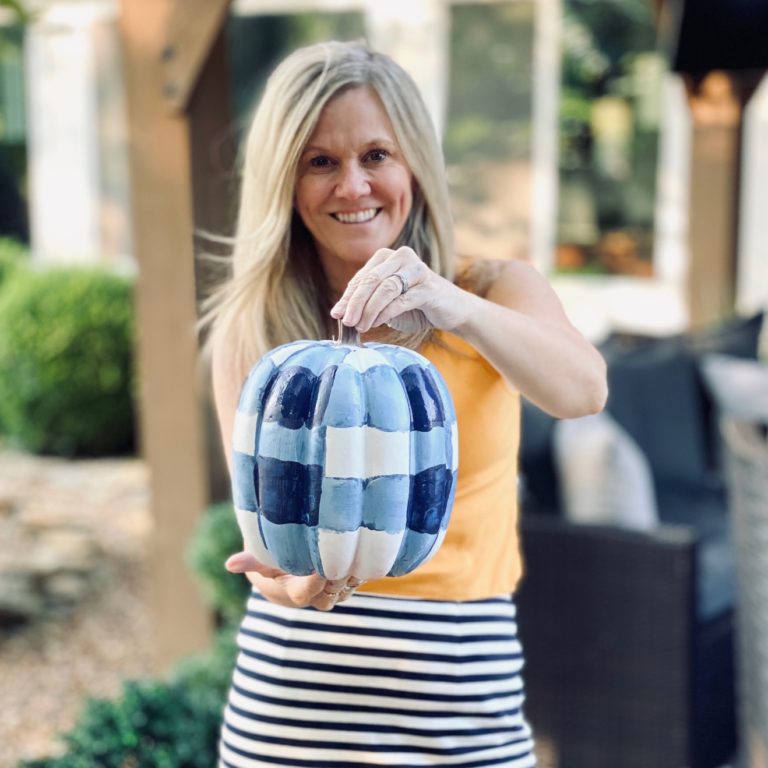
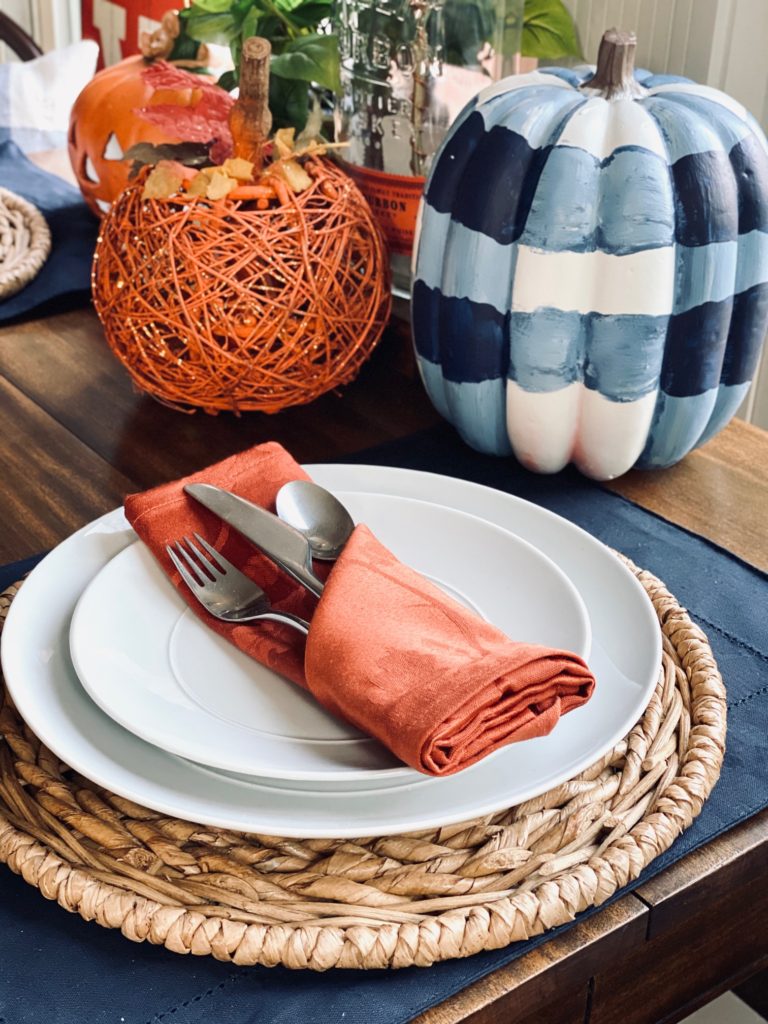
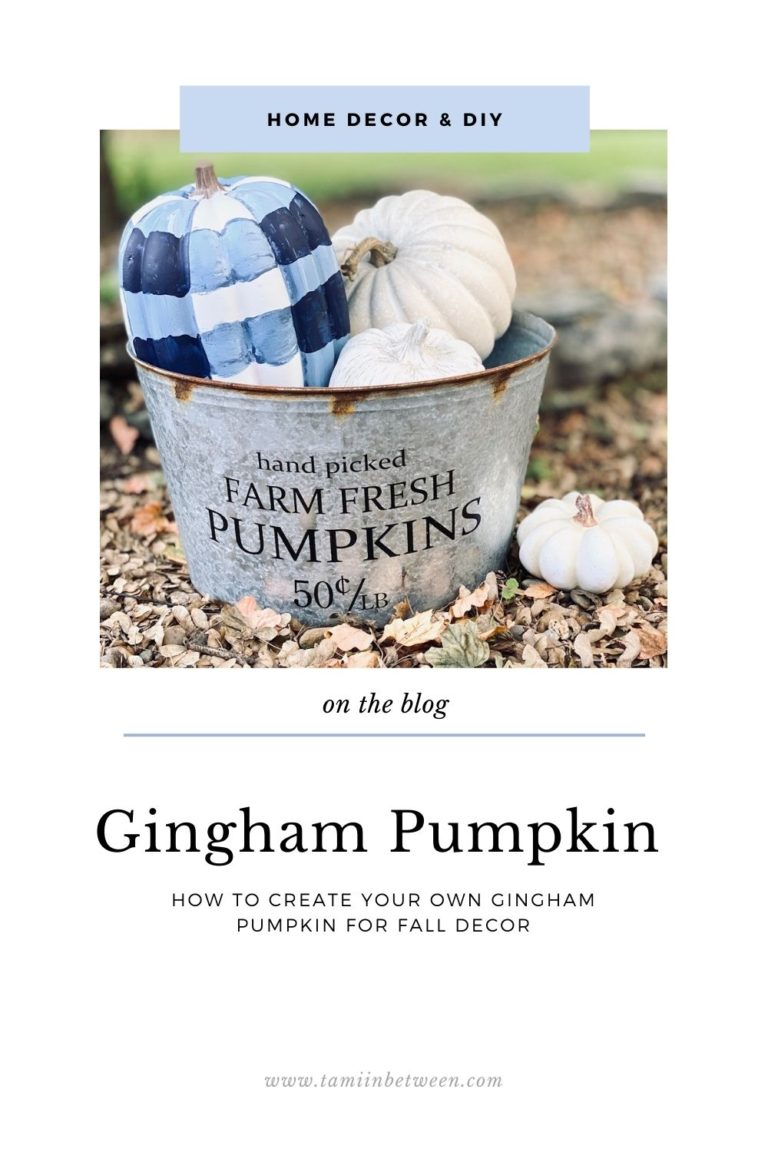
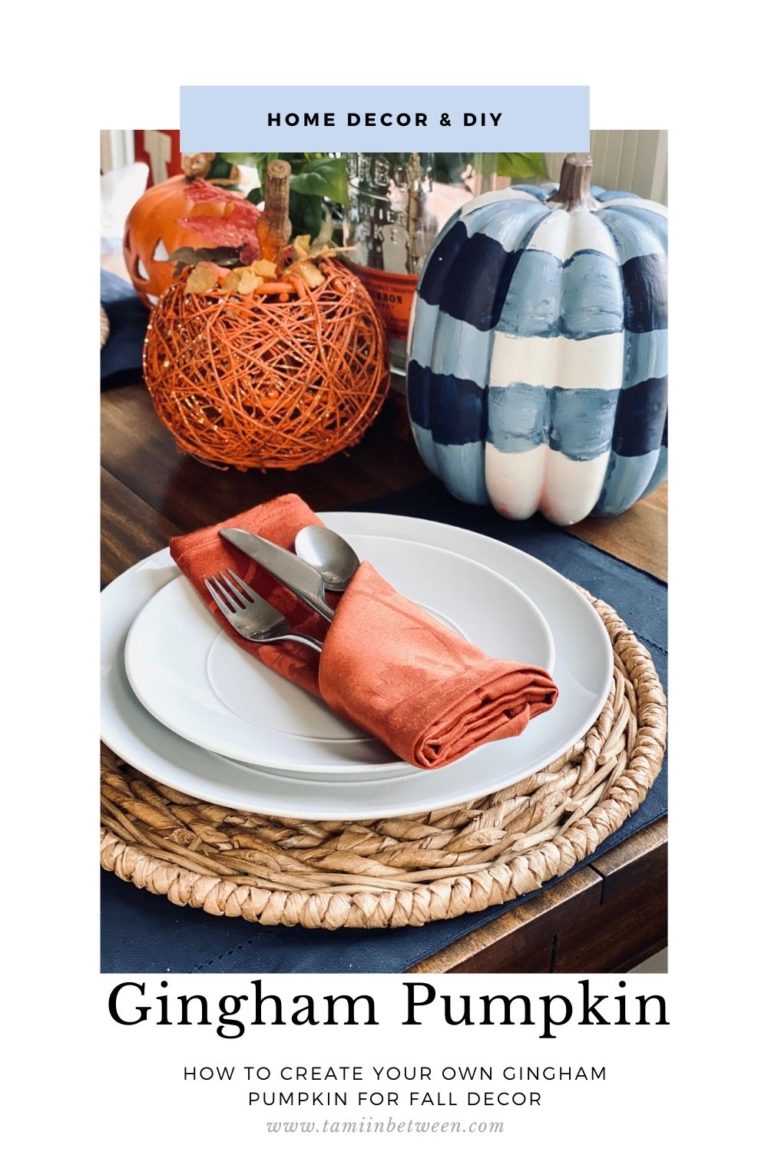
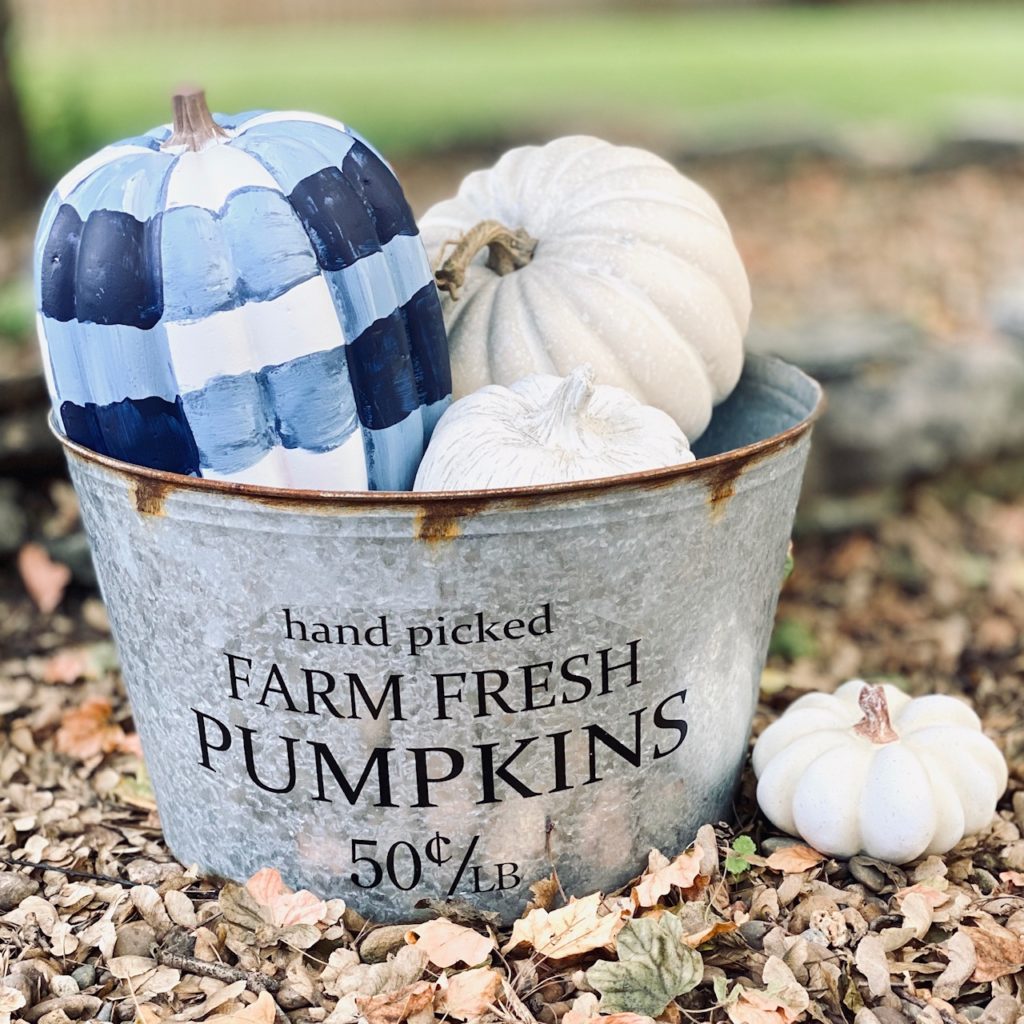
OMGourd! My fall decor has become a pumpkin explosion! I’ve got pumpkins everywhere this year. I’ve got them on tables, shelves, entrance ways and even coming out of the fireplace! One of my favorite pumpkins used in my decor this year is one I created myself, the gingham pumpkin! How cute is this guy sitting on the sun room table complimenting the orange fall decor, navy place mats and matching gingham pillows?! I can’t wait to make more! I’m so excited about how well this guy turned out that before I make more I’m sharing how you can make gingham pumpkins too because it was SO easy and SO inexpensive. I’m also sharing the how to in TWO ways to make it as easy as possible for you! One way is to watch the video (click the blue bar below) OR follow along the written step by step instructions below (with pictures) to guide you! Once you have created your own gingham pumpkin please send me pictures of your creations! I’ll share on my Instagram stories!
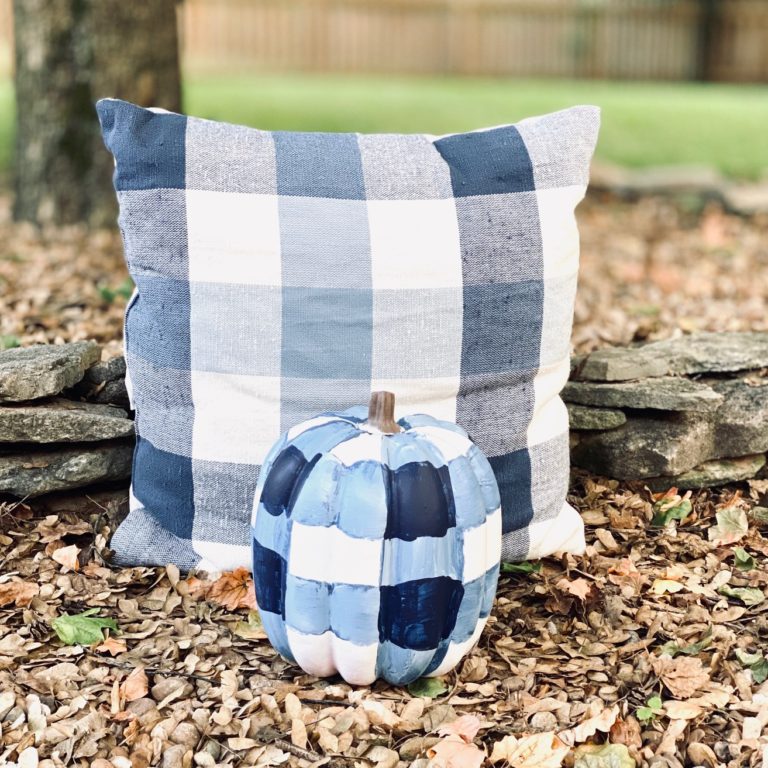
Inspiration for the gingham pumpkin were the gingham pillows that I used on the chairs of this table I decorated for fall
CLICK TO FOLLOW MY LTK SHOP FOR EASY ACCESS TO MY LOOKS, FINDS, DECOR & MORE!
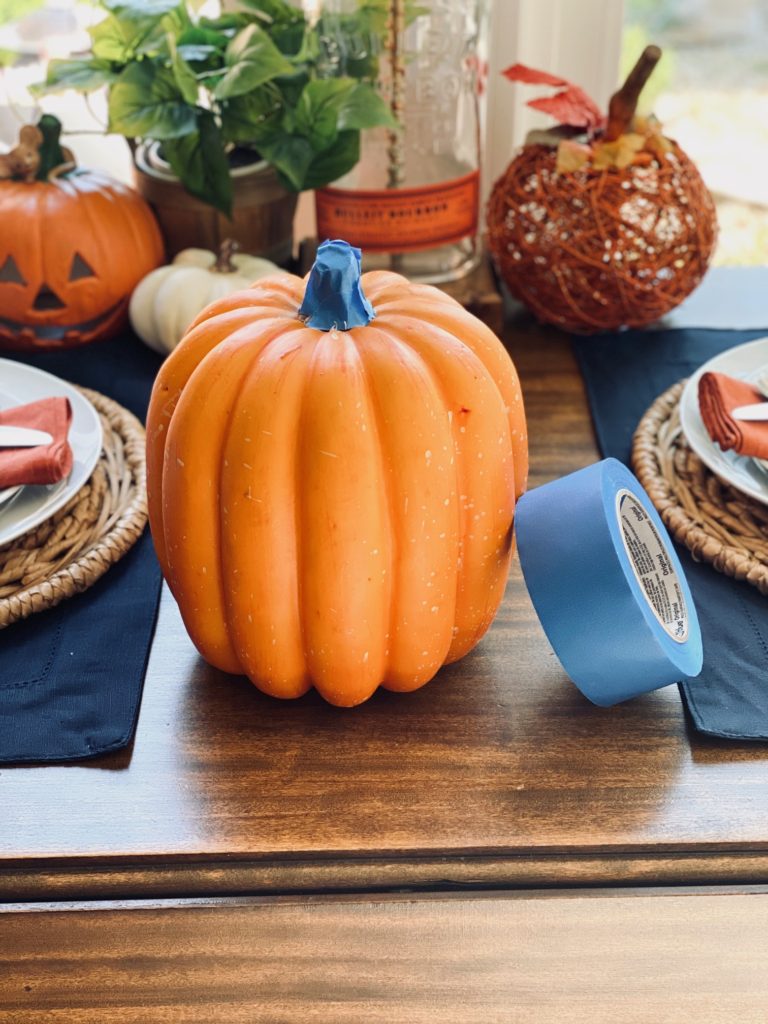
PICK A PUMPKIN
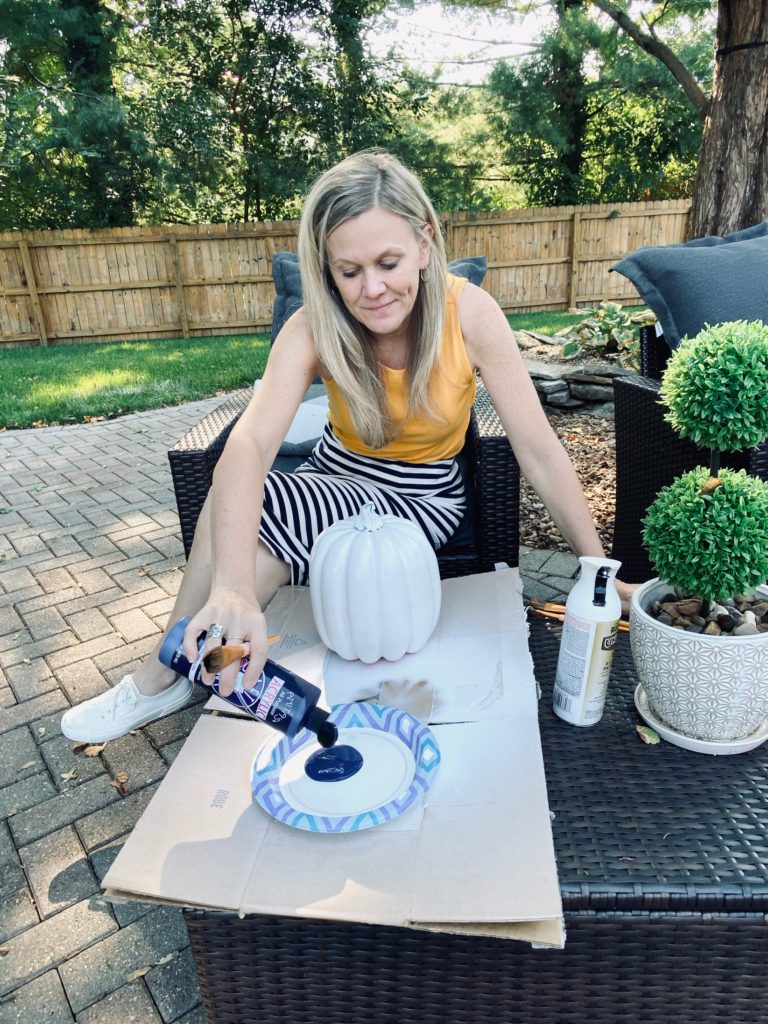
To begin, you will need a pumpkin. The pumpkin can be fresh or faux. I used faux. I went to Walmart and picked up a few faux pumpkins in different shapes and sizes. They were all under $6. I prefer faux over fresh because I will be able to keep my pumpkin for years to come. For obvious reasons, if you use a fresh pumpkin then it will only be good for this year! Next, use blue painters tape and cover the stem of the pumpkin. This is to protect it from getting any paint on it as you want the stem to remain in tact and unchanged.
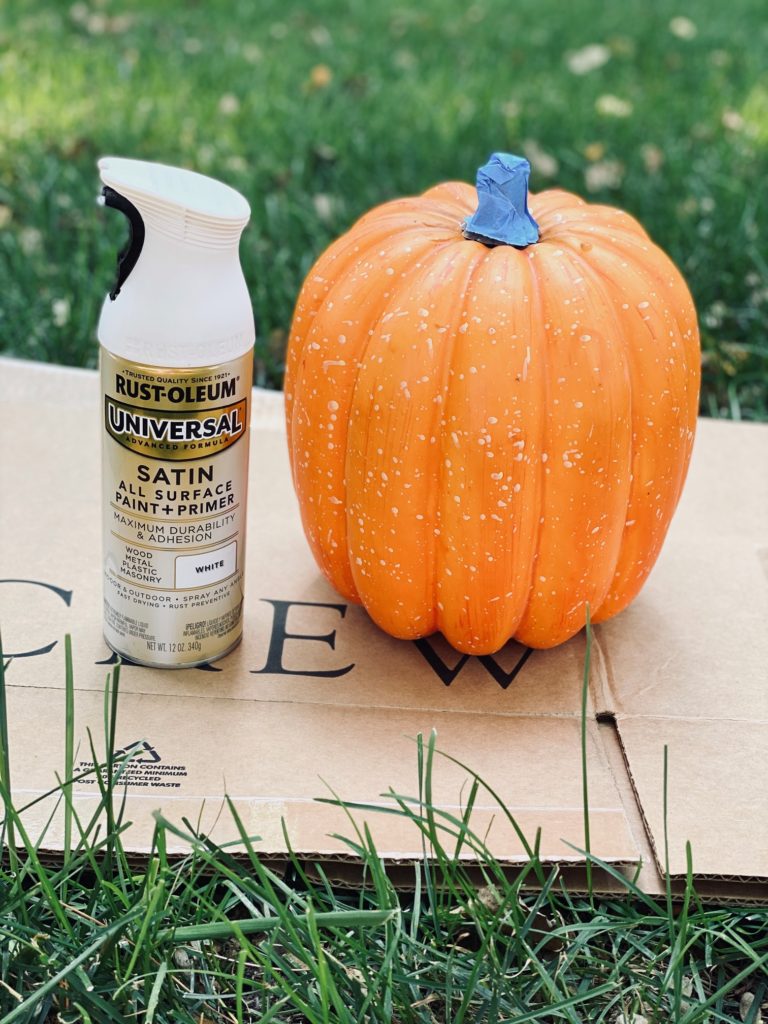
PAINT PUMPKIN WHITE
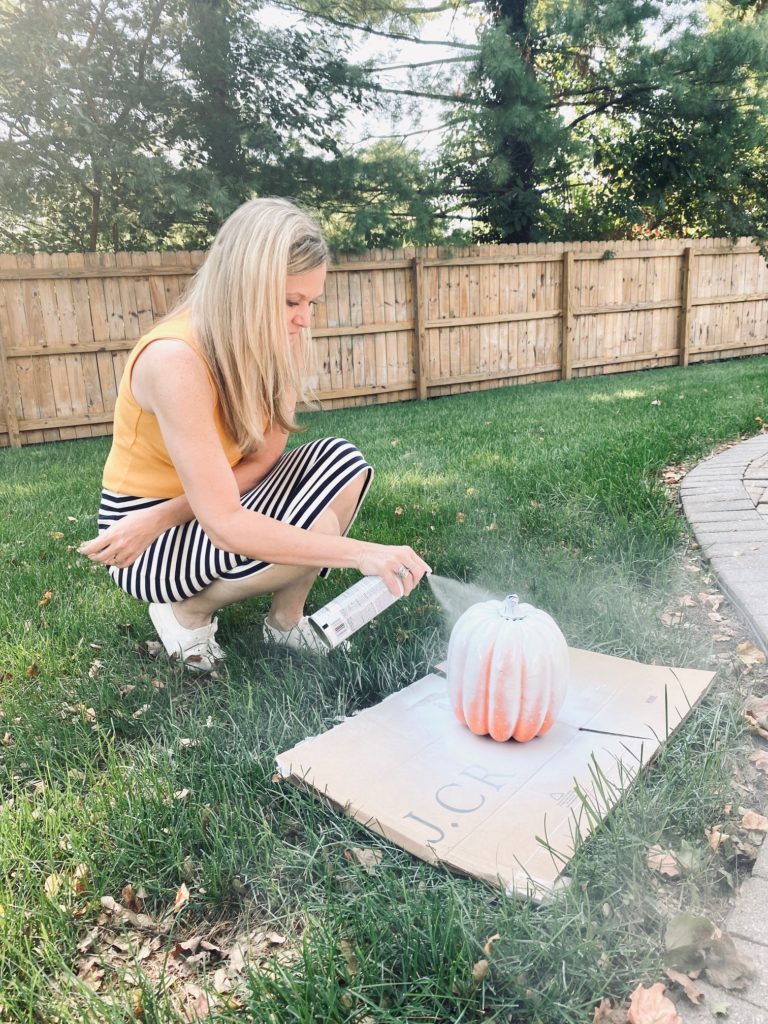
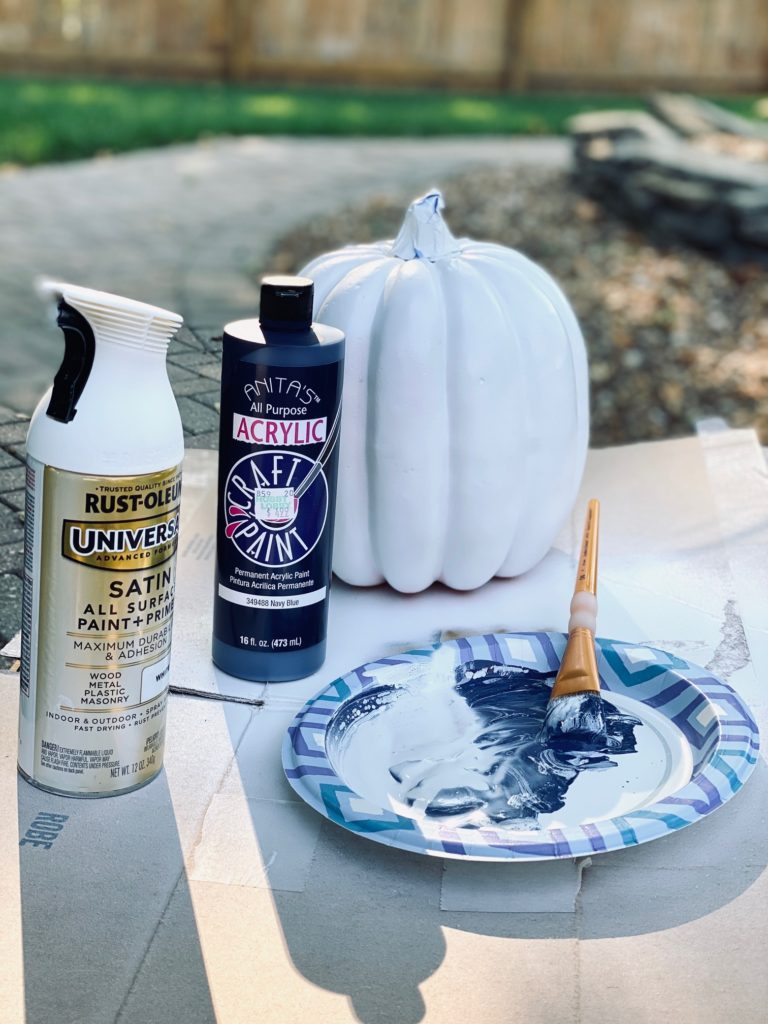
Paint the entire pumpkin white. I used white spray paint HERE (because that is what I had on hand and it was quick and easy). You can use any white paint as long as you cover the pumpkin in its entirety. I did not worry about painting the bottom of the pumpkin. If you plan to display your pumpkin in a way that the bottom is showing then you will want to make sure to bottom is also pained. Let dry before going to the next step. I waited about an hour for the spray paint to dry. It was a hot day so it dried quickly.
I used white spray paint. Any paint will do.
Spray the entire pumpkin white
Don't forget to paint the bottom if it will show in your display. I did not paint the bottom of my pumpkin as I will be displaying it as it sits now.
CHOOSE COLOR
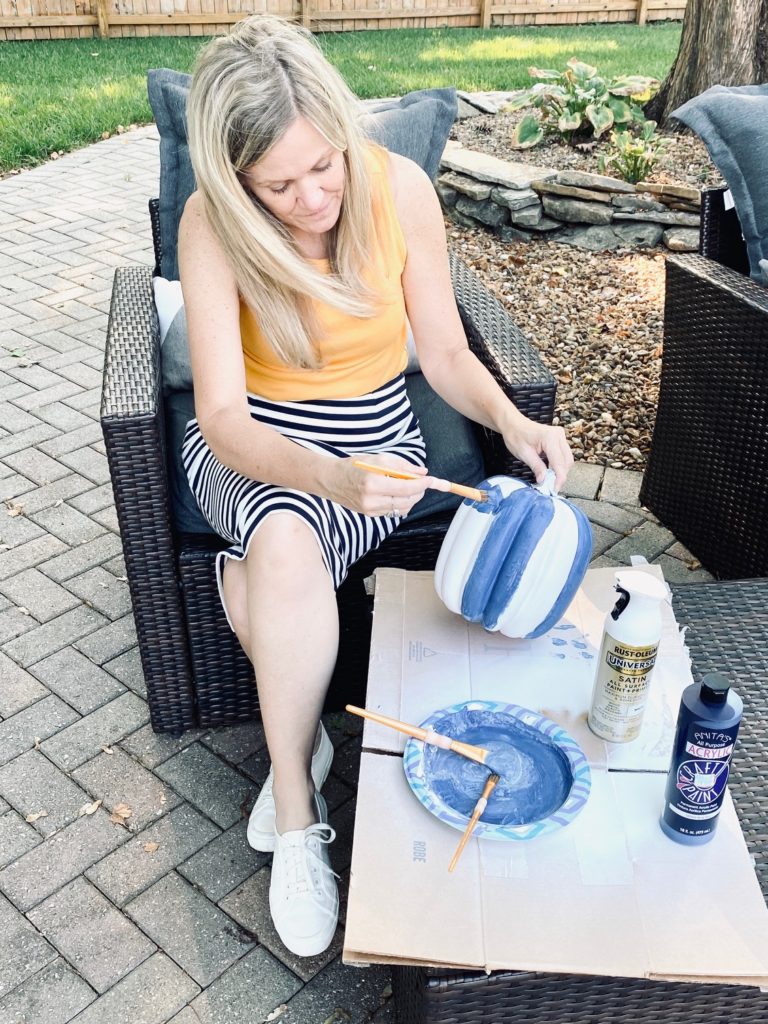
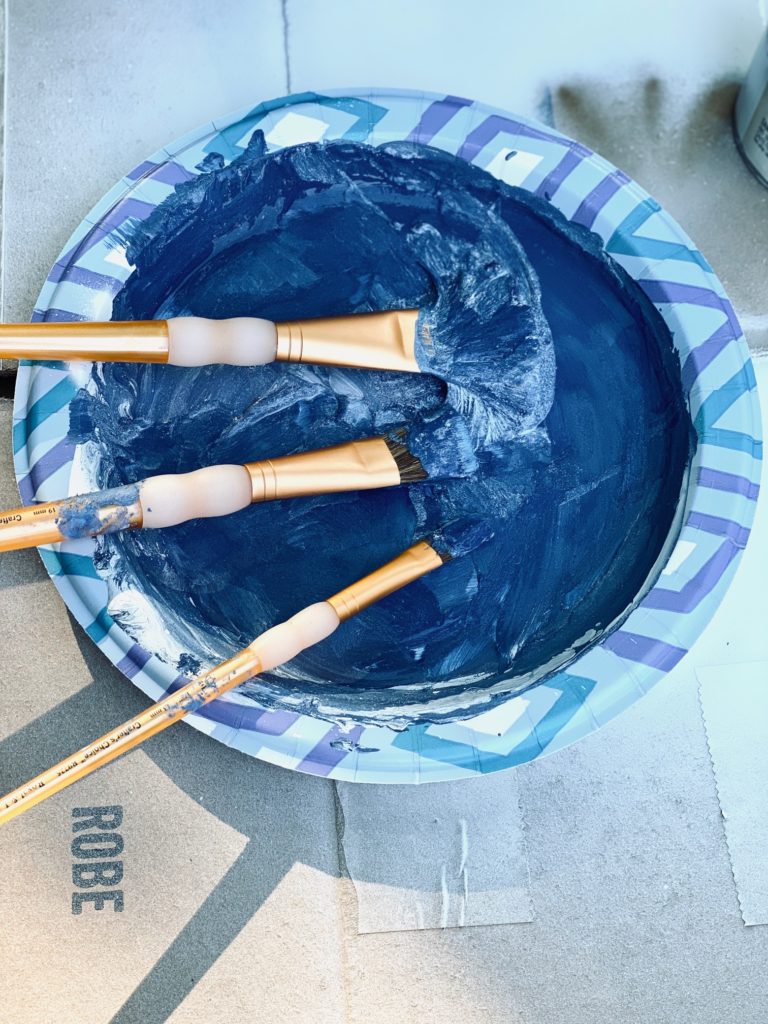
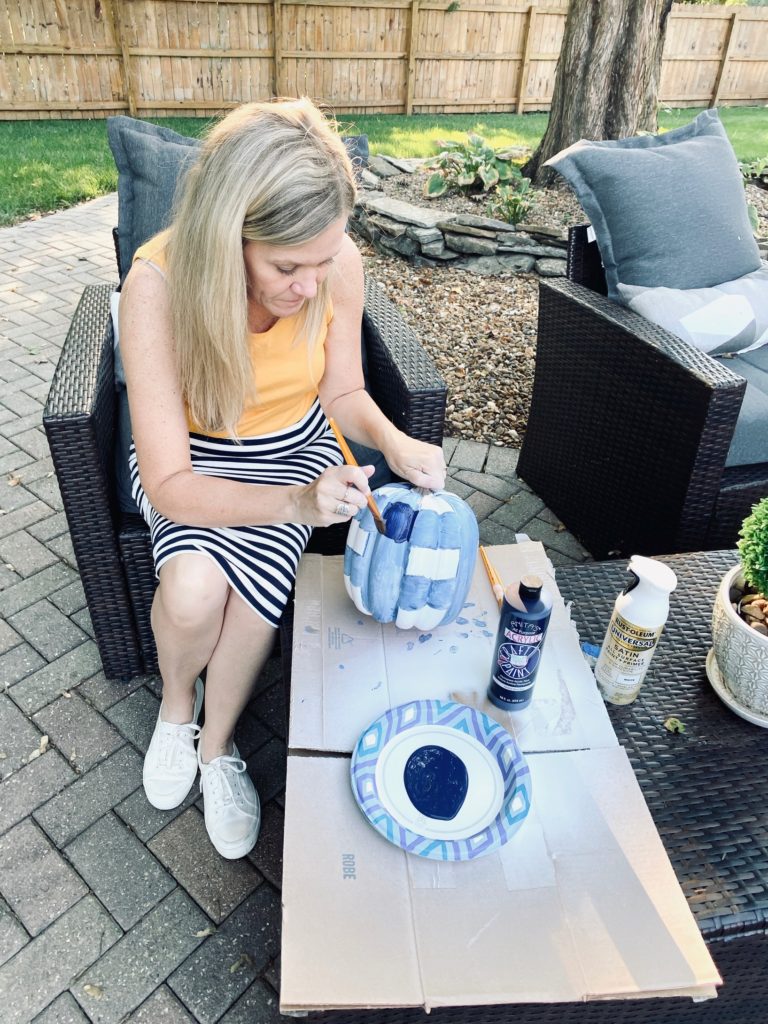
My gingham pumpkin inspiration came from a blue gingham pillow that I love. I bought navy blue paint to make the blue gingham pumpkin to match. This gingham pumpkin DIY needs only two paint colors, white and any other color you choose for the gingham pattern. How cute would these gingham pumpkins be in pink?! I purchased acrylic navy blue paint from Hobby Lobby HERE. Once you choose a main color, mix part of the main color (navy) with white paint to create a lighter version of that color (want to make the paint from navy to a light blue). For my pumpkin, I was mixing white spray paint into the navy paint (do NOT recommend). I should have bought white acrylic paint when I bought the navy. Trying to spray white paint into the navy was messy. I used a paper plate to mix the colors. In the picture below, the blue stripes look very dark. I kept adding white paint until I had the light blue color that I desired as you want these stripes to be a light color.
I used a paper plate to mix my colors
Mix white paint into your color paint
Once you have the light version of your paint color. Begin painting stripes down the pumpkin
PAINT LIGHT STRIPES
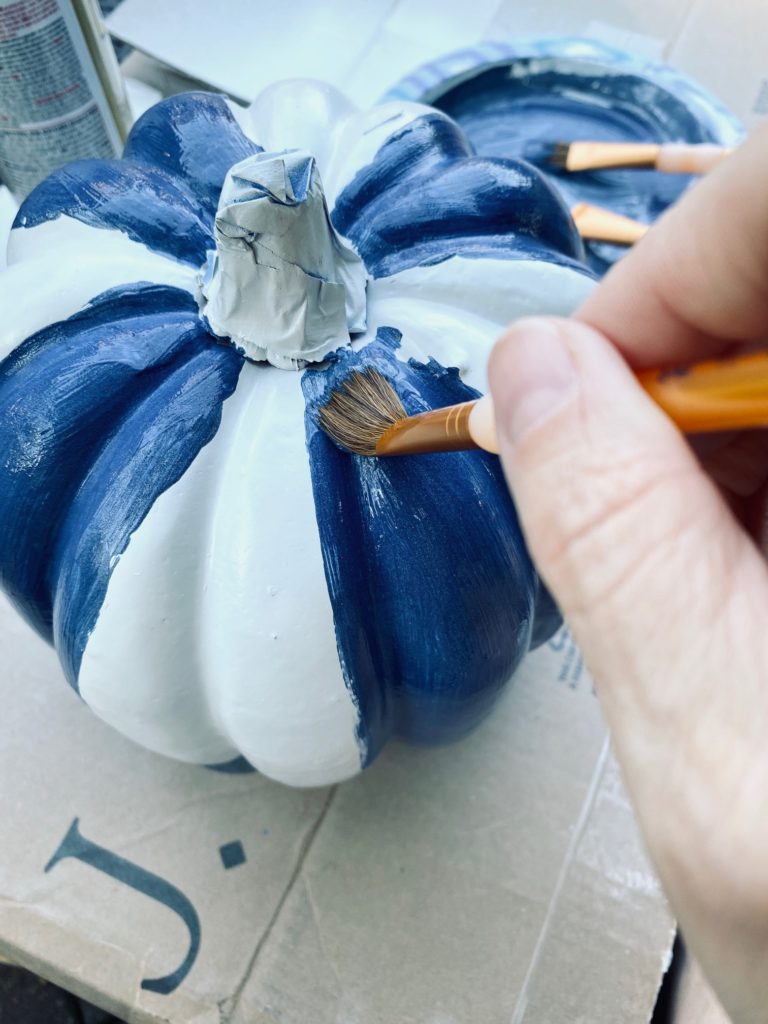
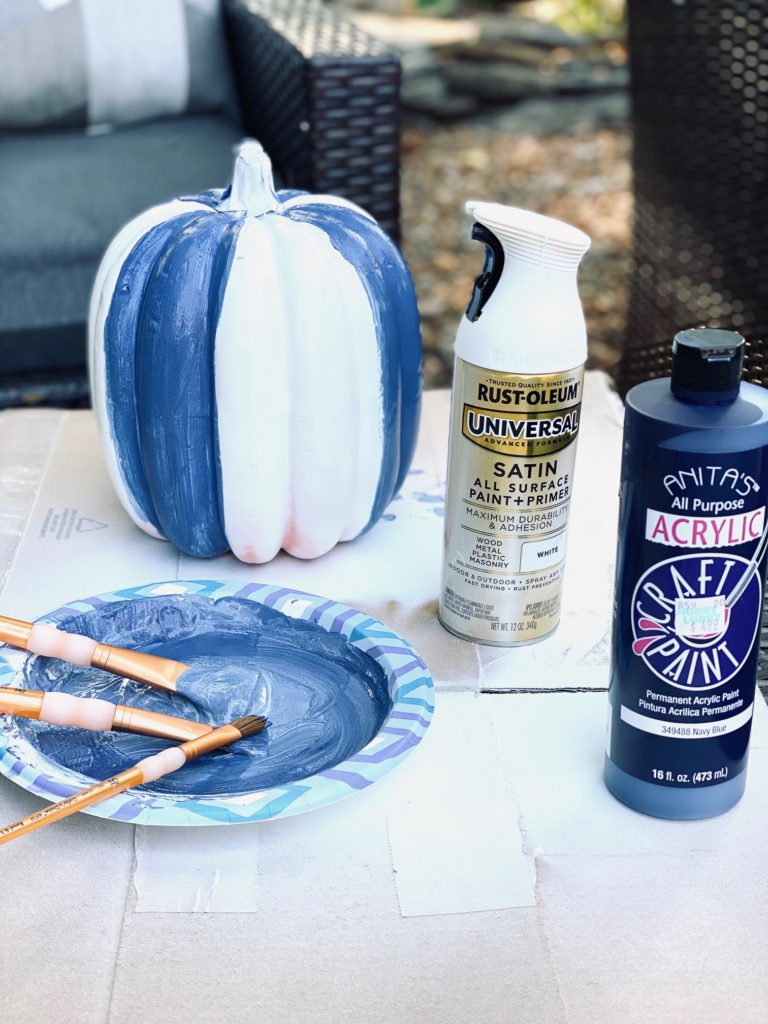
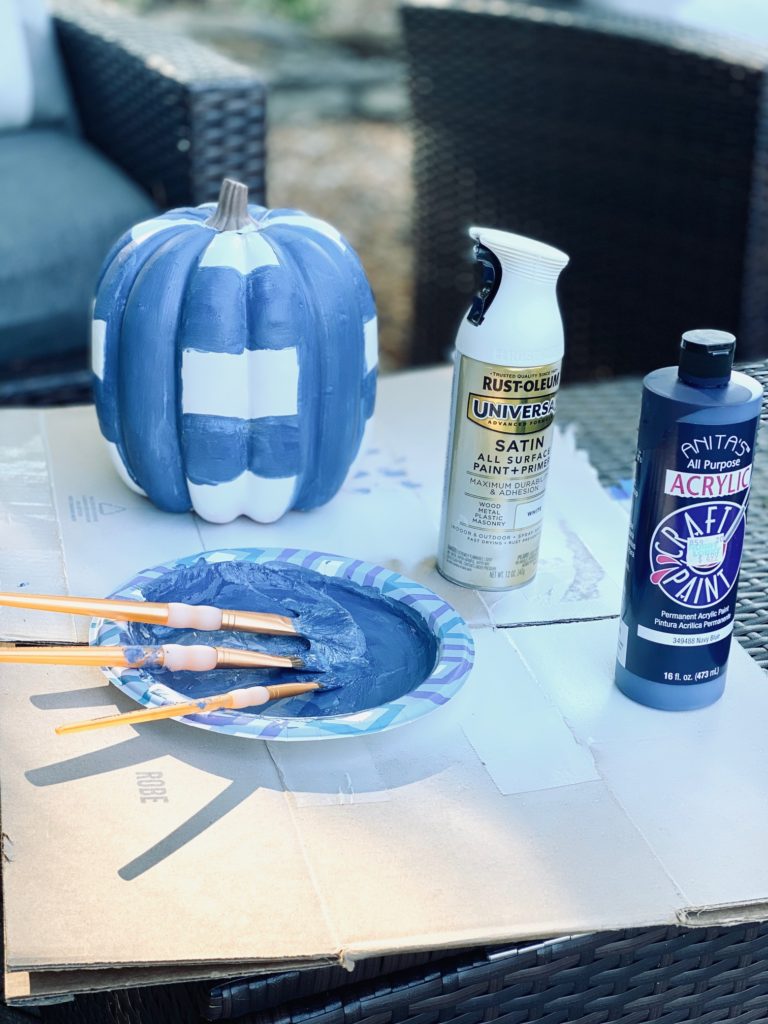
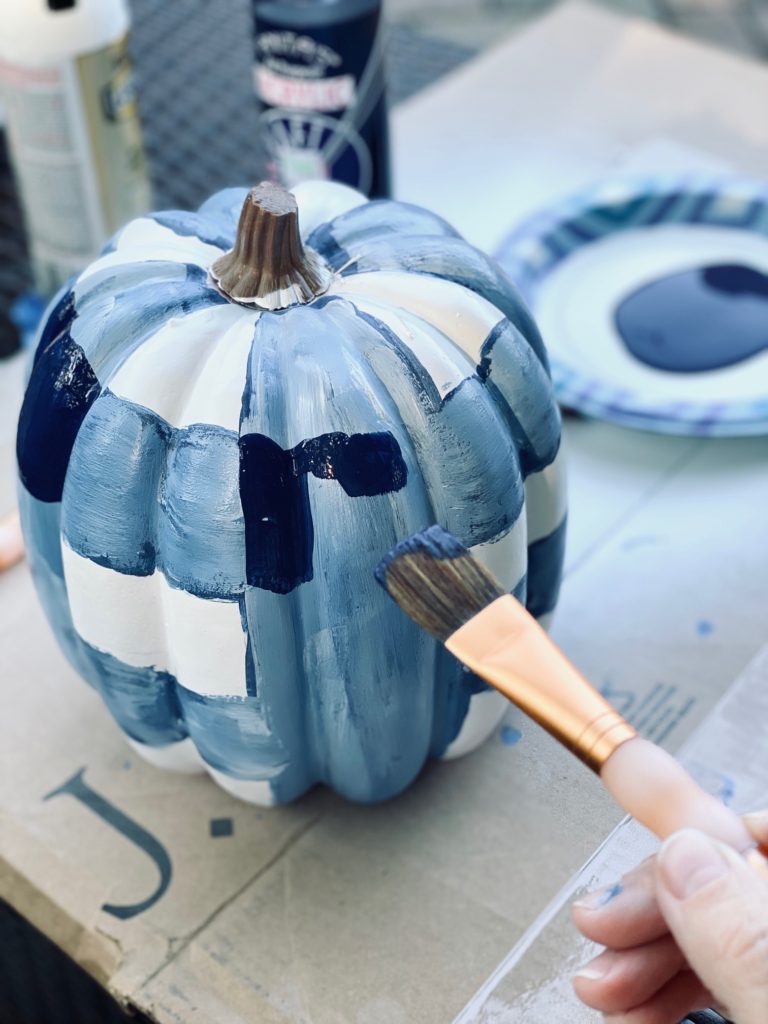
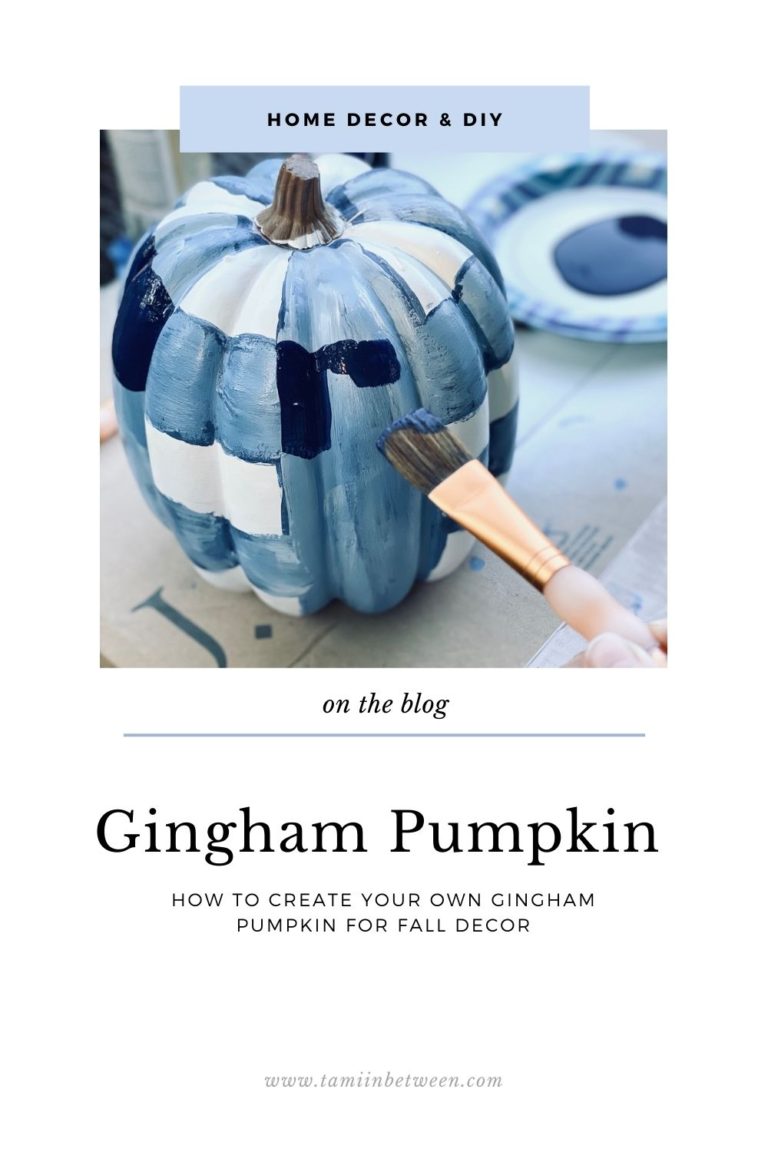
With the paint mixed to a lighter color, start painting stripes down the pumpkin in sections from stem to the bottom of the pumpkin. For this pumpkin there were 12 sections around the pumpkin. I painted two sections, skipped two sections all the way around. I ended up with 4 white sections and 4 light blue painted sections going up and down the pumpkin. Do no worry about perfect lines. This is a DIY that you do not want perfection. It will look better without overthinking it and trying to make it “perfect”. Once you have 4-5 stripes painted down the pumpkin, you will paint two stripes around the pumpkin. Paint the two light blue stripes around the pumpkin 1/3 and 2/3 down the pumpkin. If you have a much larger pumpkin you may want to add a third stripe around.
Paint 4-5 stripes down the pumpkin in the light color paint
Do not worry about perfect lines.
I used three brushes. Big one for mixing colors, medium for painting stripes and small for detail around stem and cleaning up lines
Paint 2-3 stripes around the pumpkin in the light color paint
Paint Gingham Squares
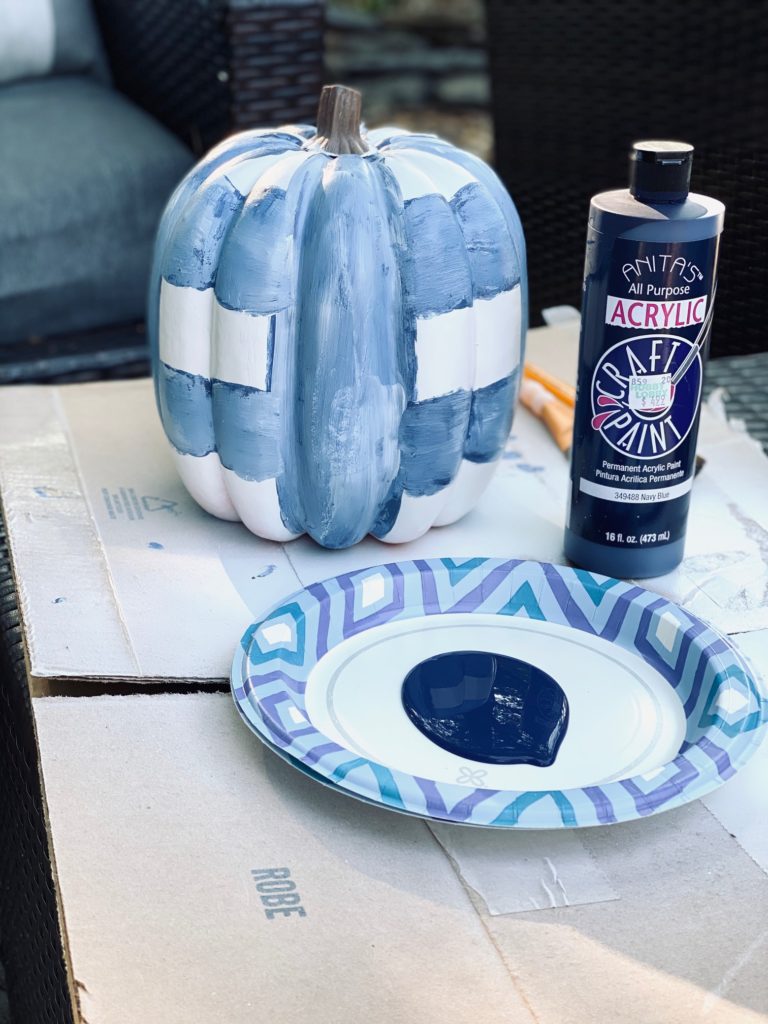
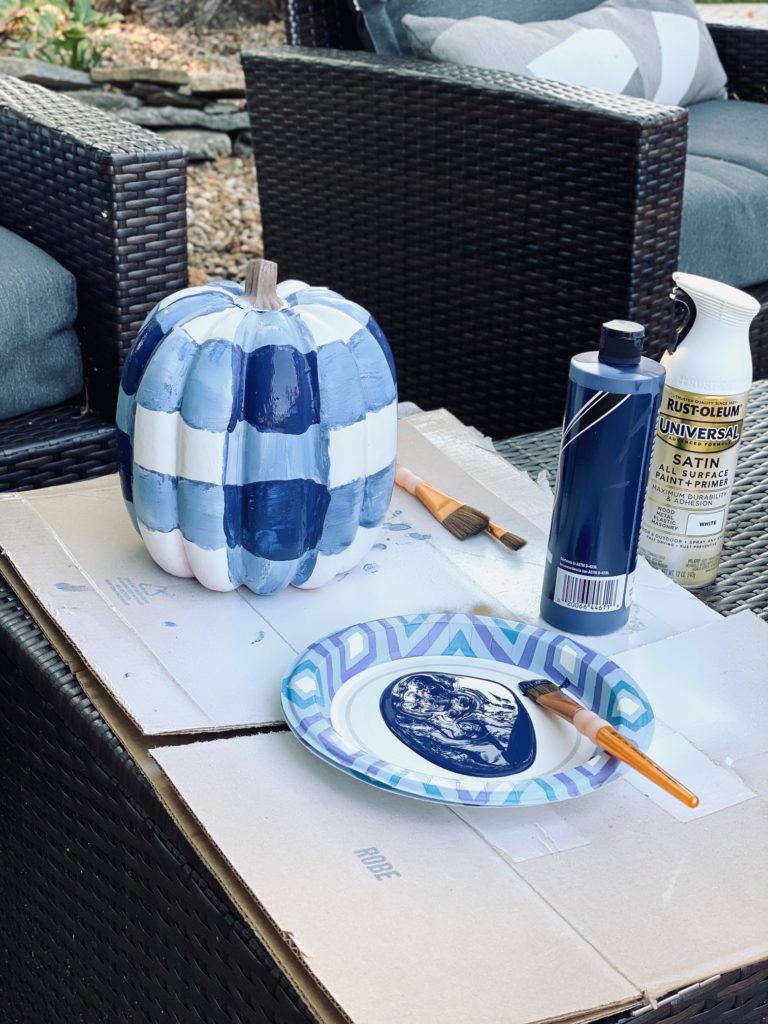
Once the light stripes are down and around the pumpkin the next step is to add the dark squares that will complete the gingham pattern. Paint a dark square everywhere the light stripes down and light stripes around intersect,. Paint the square the original paint color (navy). Repeat all the way around the pumpkin.
Put the dark paint onto a clean paper plate
Begin painting the squares where the light paint cross the dark paint color
Again, the lines do not need to be crisp. It will look better a little rough around the edges!
Almost done!
FINISHING TOUCH
If you are going to put your gingham pumpkin outside I would suggest giving it a clear coat spray to protect it. Clear coat comes in either a matte (flat) or gloss (shiny) finish . I prefer the gloss HERE but if you prefer a flat finish this one works well HERE. That is it! An easy gingham pumpkin DIY project that can be done quickly and customizable in any color!
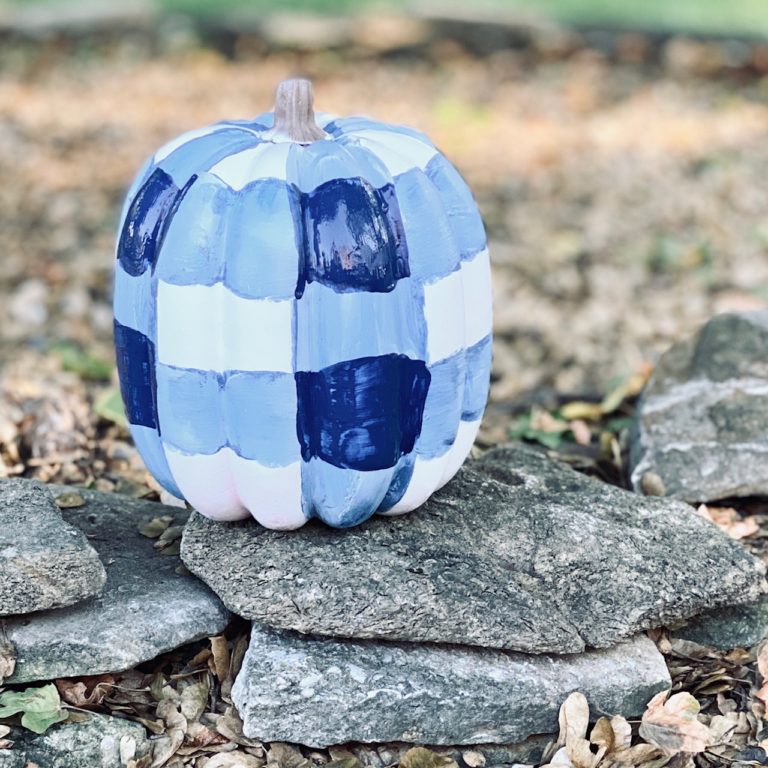
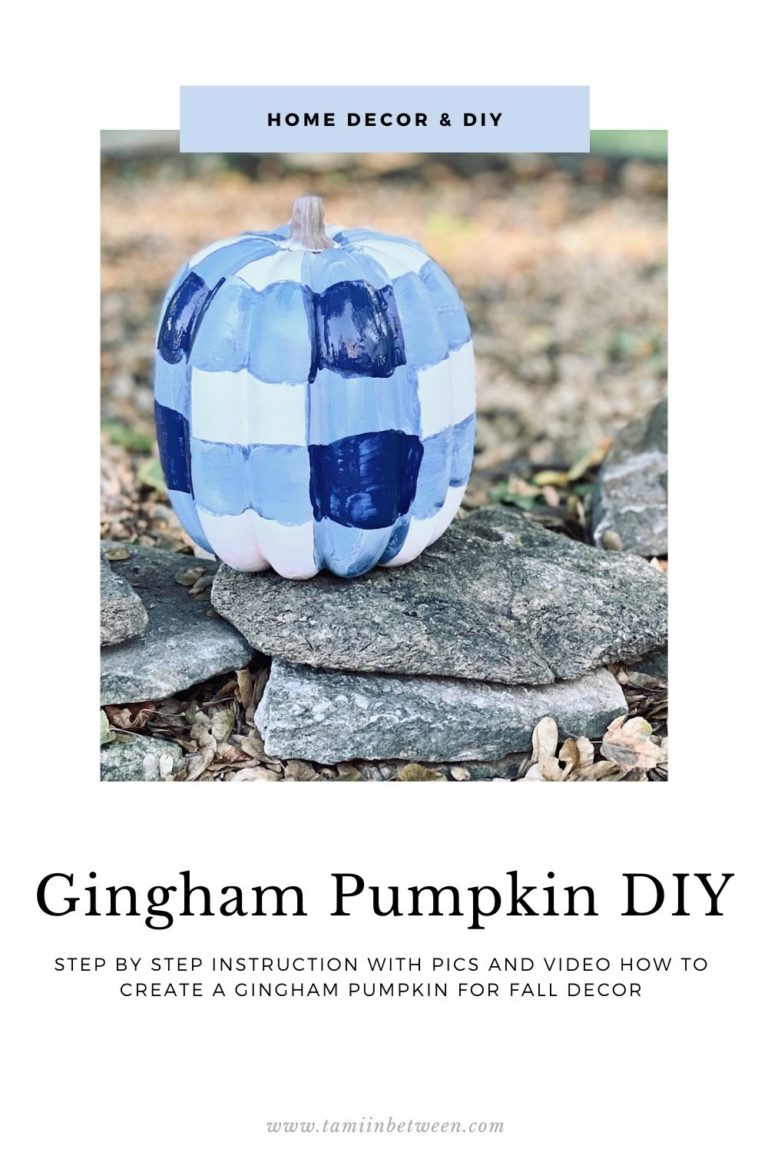
From a plain orange faux pumpkin to a fun, custom gingham pumpkin that you can DIY!


Tami! This is an amazing DIY and I of course LOVE the pins you made to promote it! I can’t wait to recreate this myself 🙂 thanks for sharing!
Thanks Helen! I learned from the best! Almost 500K monthly viewers and I haven’t even used all of your tools yet!