Bathrooms and kitchens are expensive to renovate. Here are a few tips to help you refresh your master bath without spending the big bucks. For under $500 dollars I was able to do a full master bath update and completely transform the space. I created a modern and simplified bathroom that increased the value of our home and did it with very little investment (it did cost me some elbow grease though). Here is exactly how I did it!
Be Realistic
If you want to rip out old counter tops for new, swap the dated tile for trendy tile or add/remove walls then this is not the blog for you. I’m sharing a few tips on how to update a bathroom on the cheap! That means keeping the scope of the update realistic and simple. Which translates into working around what you already have. Trust me, I desperately wanted to get rid of the dark and dated granite for a light colored quartz counter top and swap out the two antiquated almond colored sinks and tub for crisp white ones and say buh-buyeeee to the no longer popular oil rubbed bronze. However, replacing all that would have cost thousands instead of hundreds to update. Get creative to work with what you have. This means finding ways to give new life to make the antiquated parts of the space relevant or at the very least less noticeable! One way to do that is by painting. Paint will do wonders to update any space so lets start there.
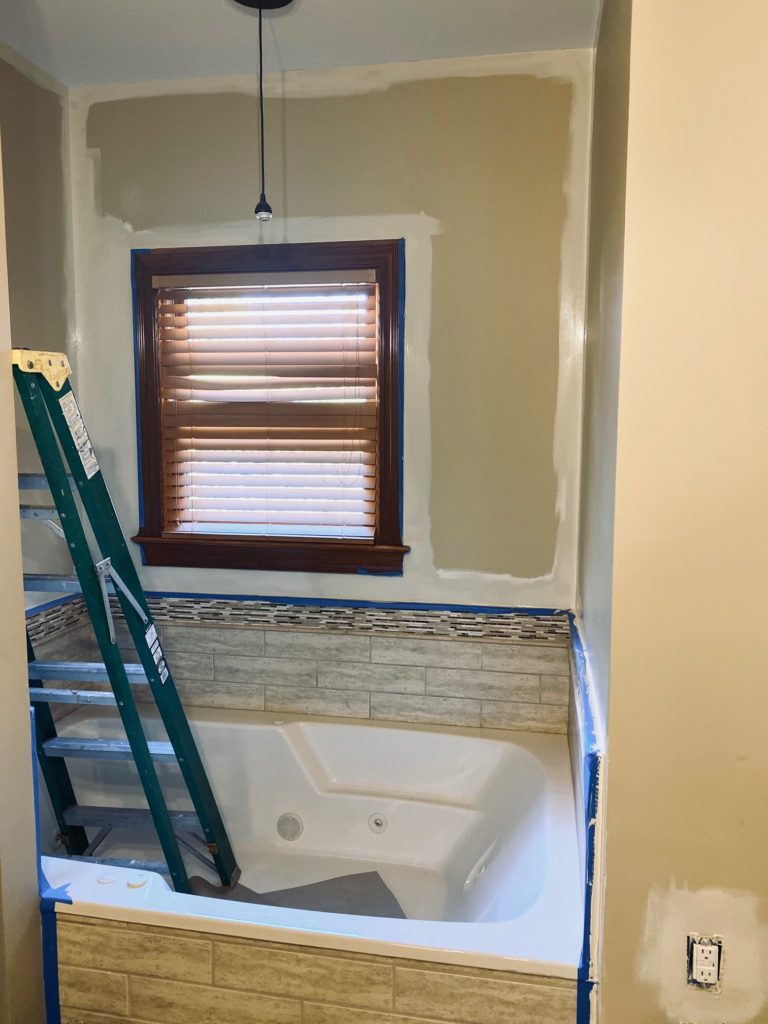
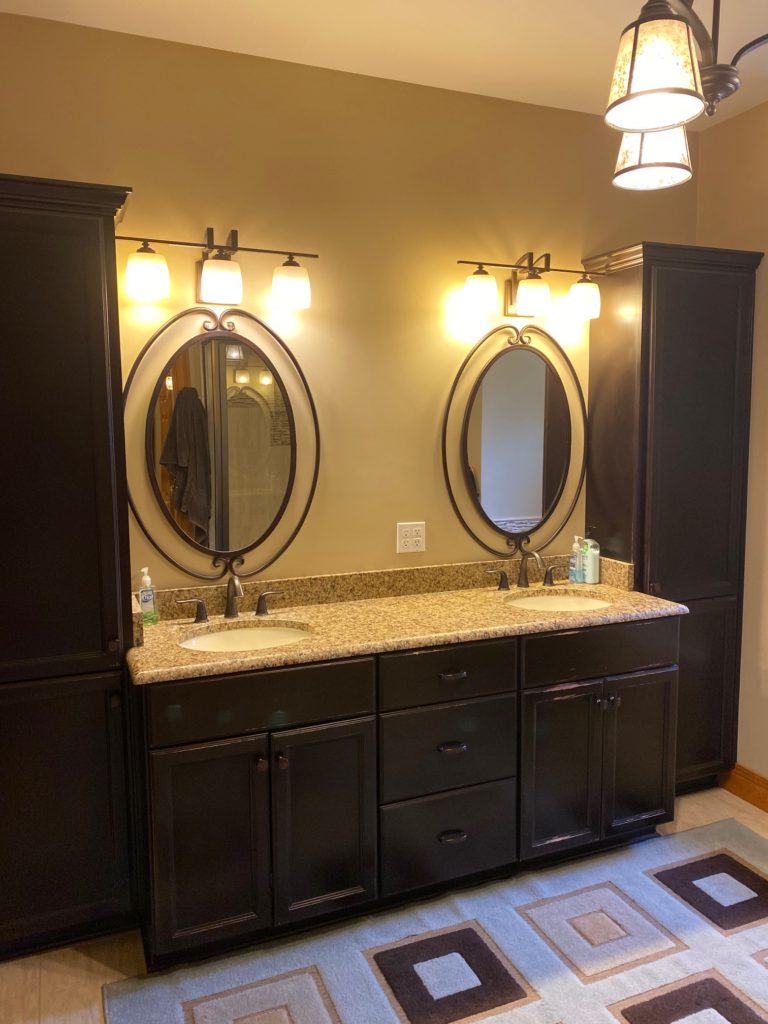
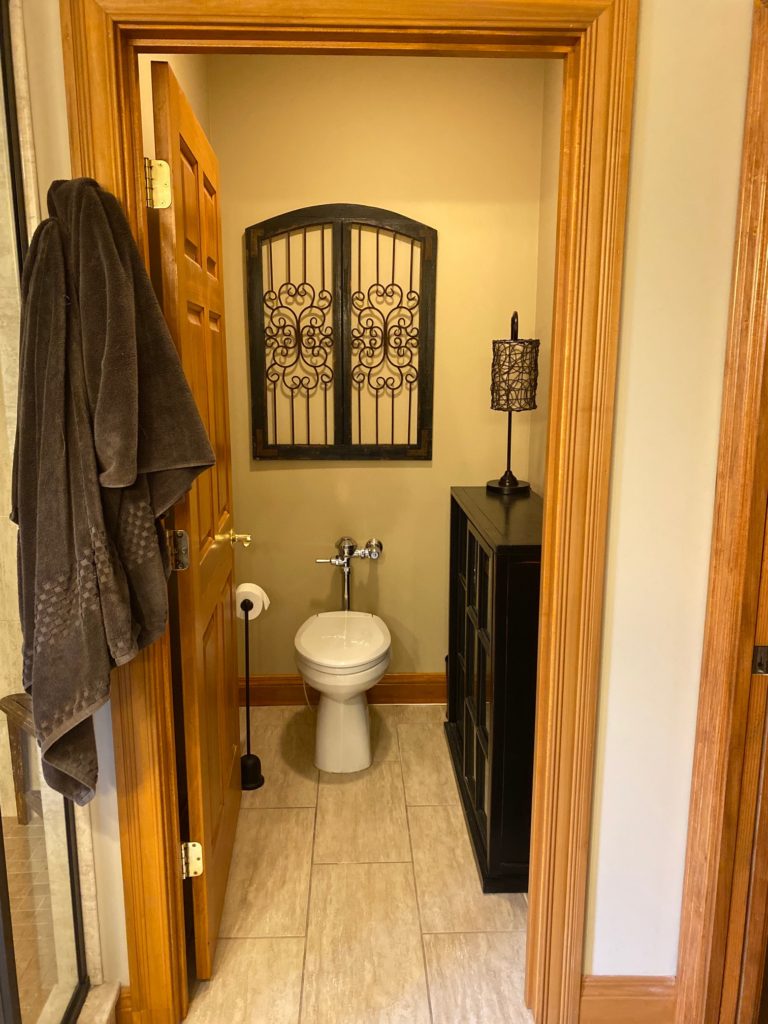
BEFORE the master bathroom DIY update - dark and dated
Paint
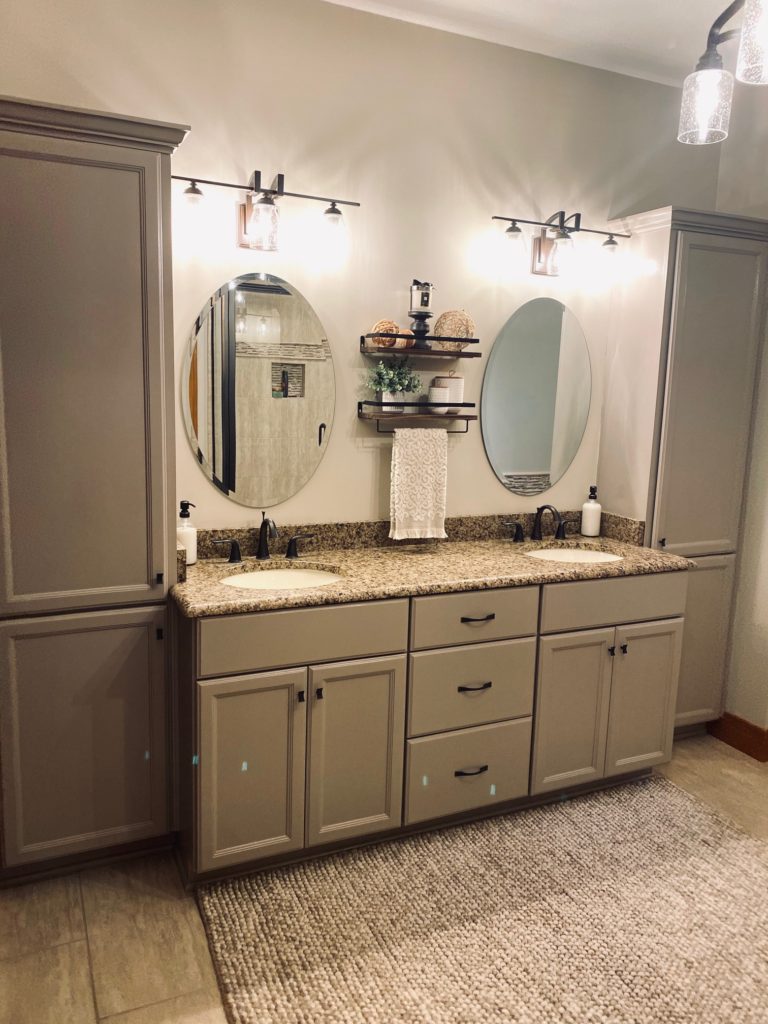
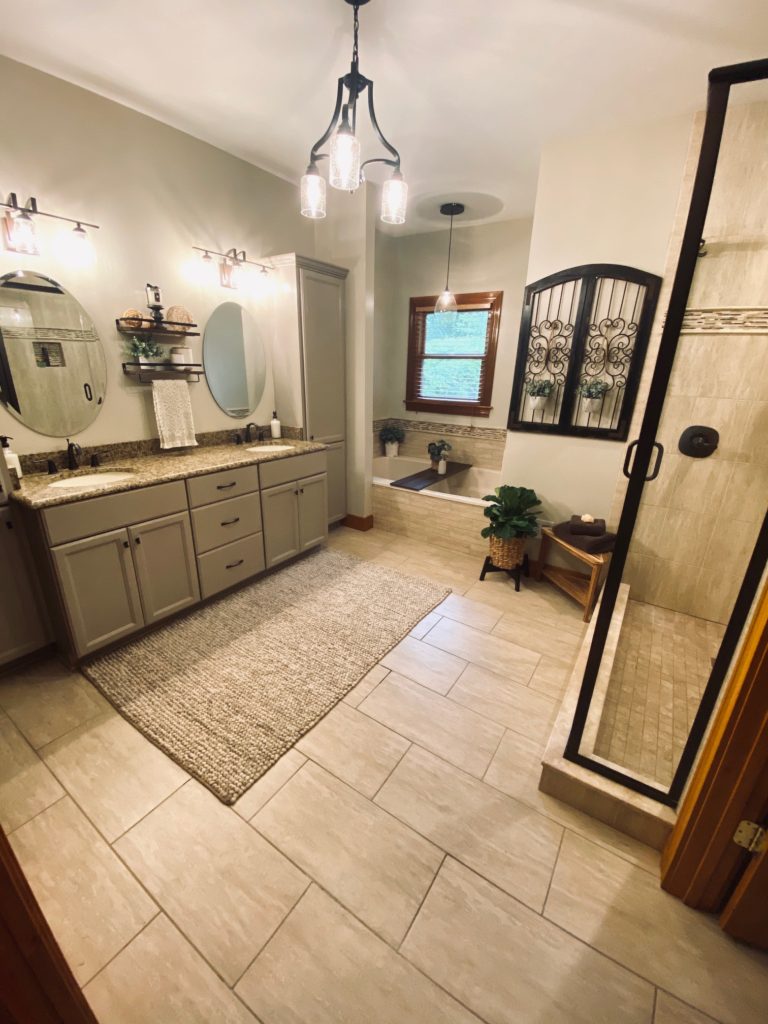
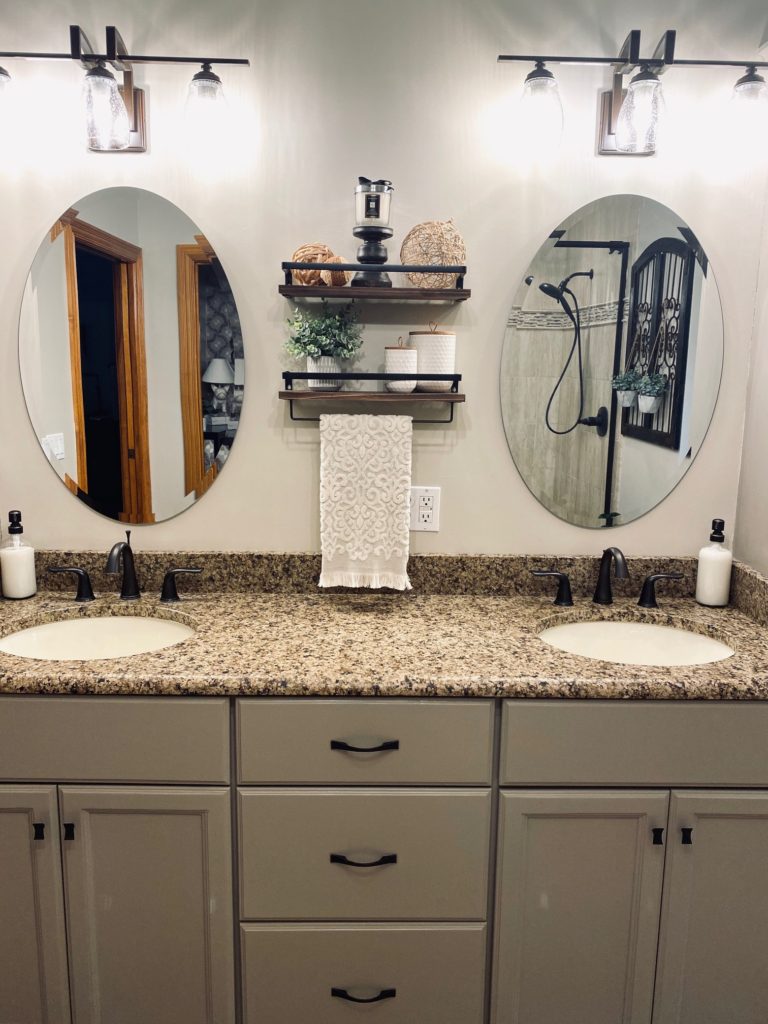
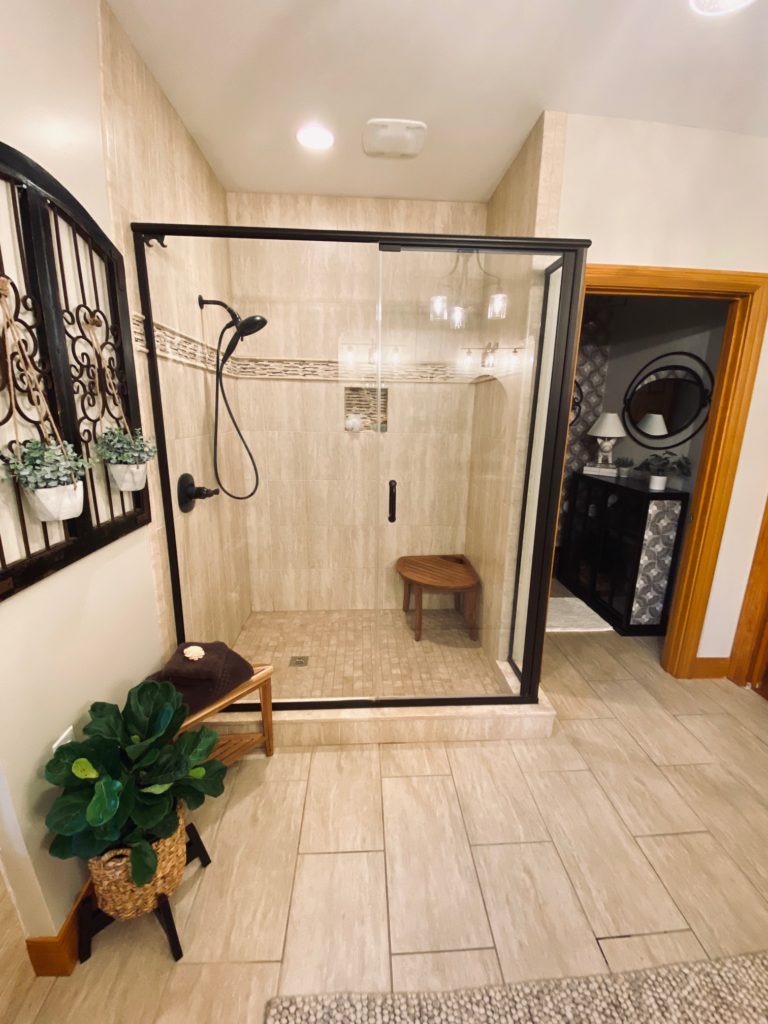
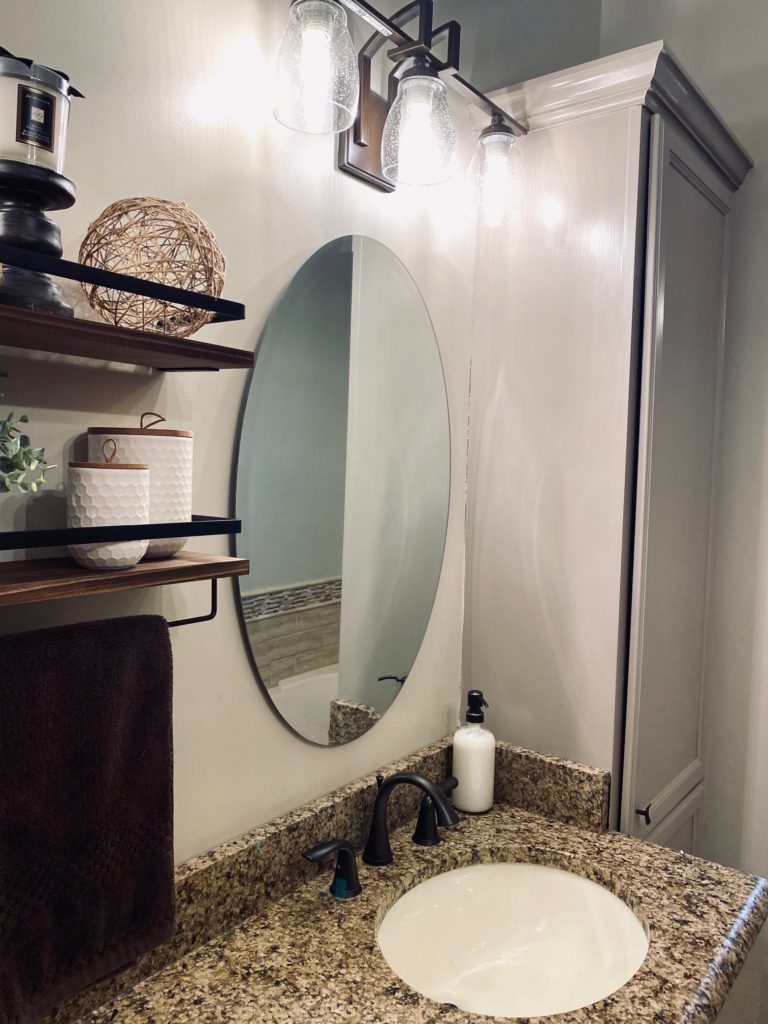
Paint the walls. Go light and bright! Paint is a game changer. It’s cheap, can be done yourself and is not time consuming to do for a bathroom update. My bathroom was dark beige. The first thing I did was paint all the walls a lighter color. The walls around the tub and toilet area I painted Sherwin Williams Aesthetic White. For the rest of the bathroom I painted walls Accessible Beige. Both colors are on the same color strip with Accessible Beige being one shade darker. I chose these colors to get away from the beige-brown palette. These “greige” colors were the best option for blending with the existing almond sinks and tub. I wanted to paint walls white or light gray but that would have resulted in the almond sinks and tub to look dirty and stand out more. Work with what you have, not what you wish you had!
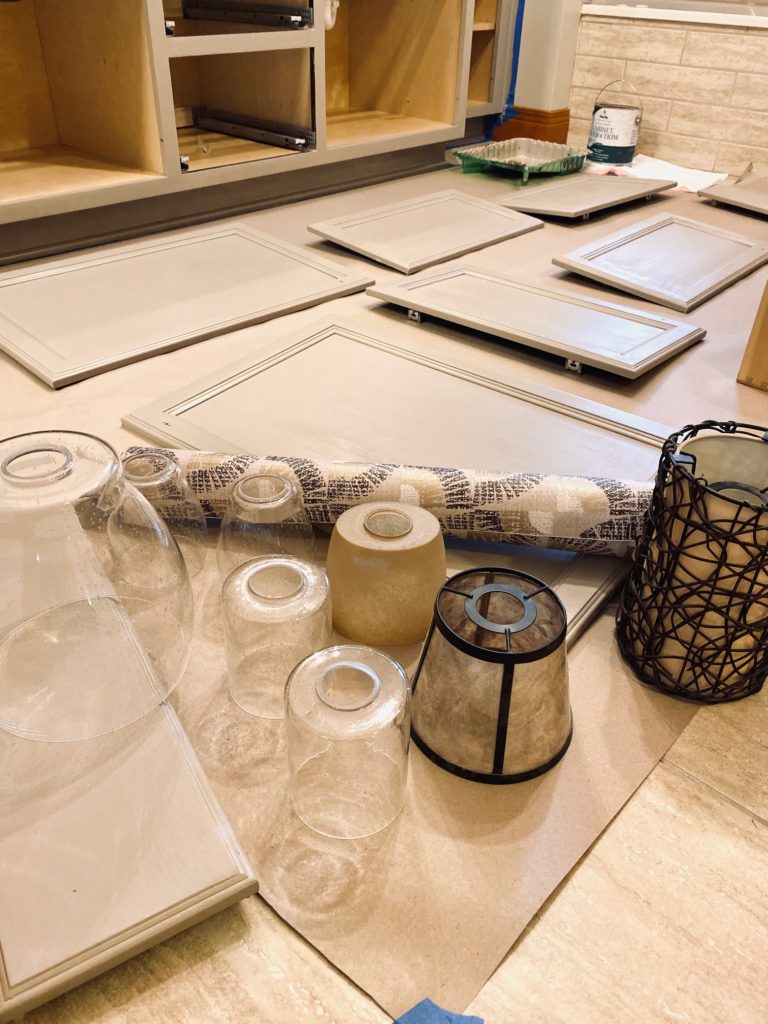
First two pictures show painting walls lighter and brighter and moving away from the darker beige color. Next two pictures show sanding and painting dark brown cabinets a lighter “greige” color to update the space.
And Paint Some More
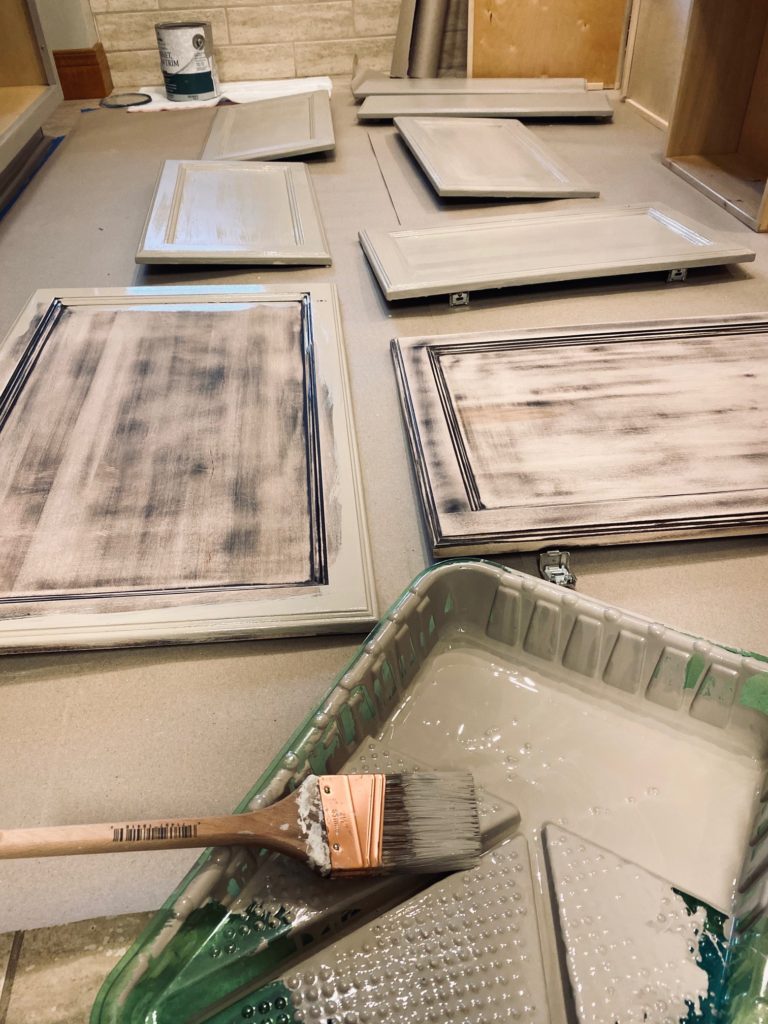
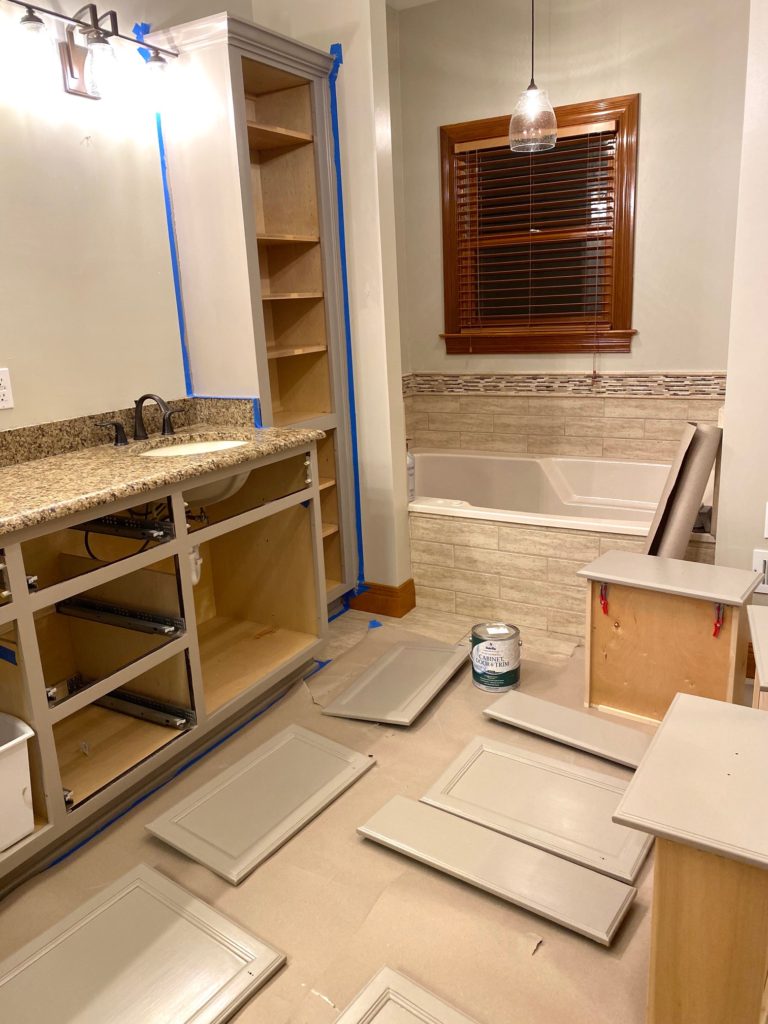
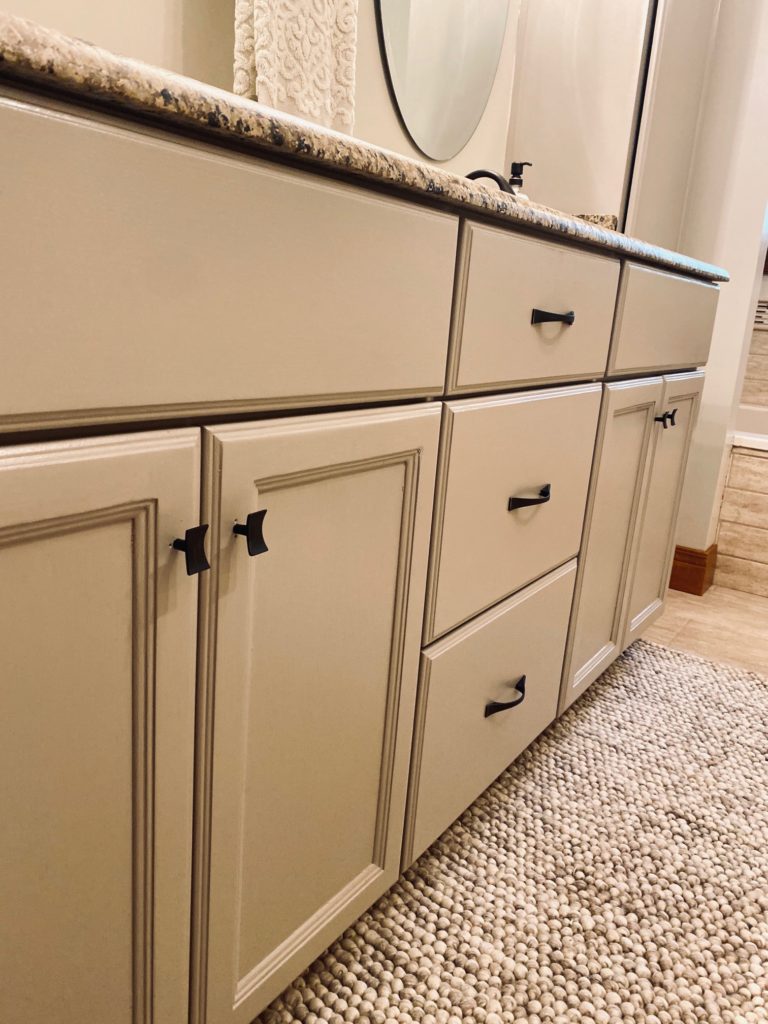
Paint the cabinets instead of replacing. Painting cabinets will refresh tired and worn cabinetry. It also offers the opportunity to bring in a great accent color (this navy blue color HERE would look spectacular on a bathroom vanity or kitchen island)! I painted all the dark brown cabinets in the bathroom Sherwin Williams Tony Taupe. This made a huge impact in modernizing the space by lightening it up.
TIP: buy cheap painting materials and throw them away when done. Save the hassle and time of a messy cleanup!
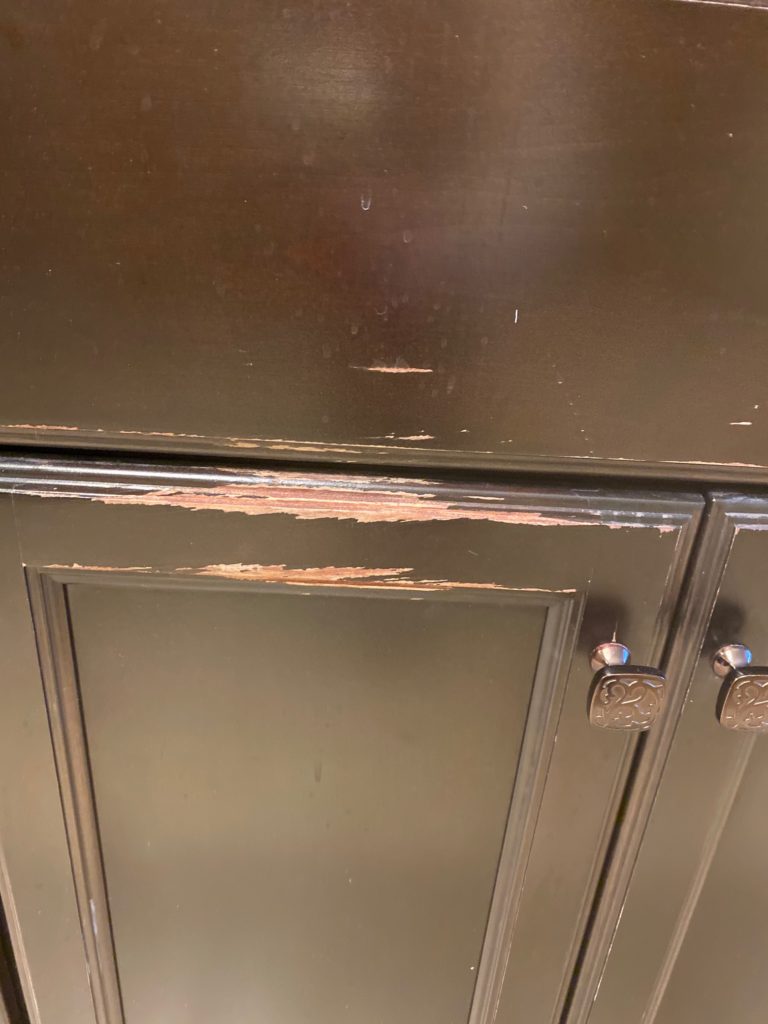
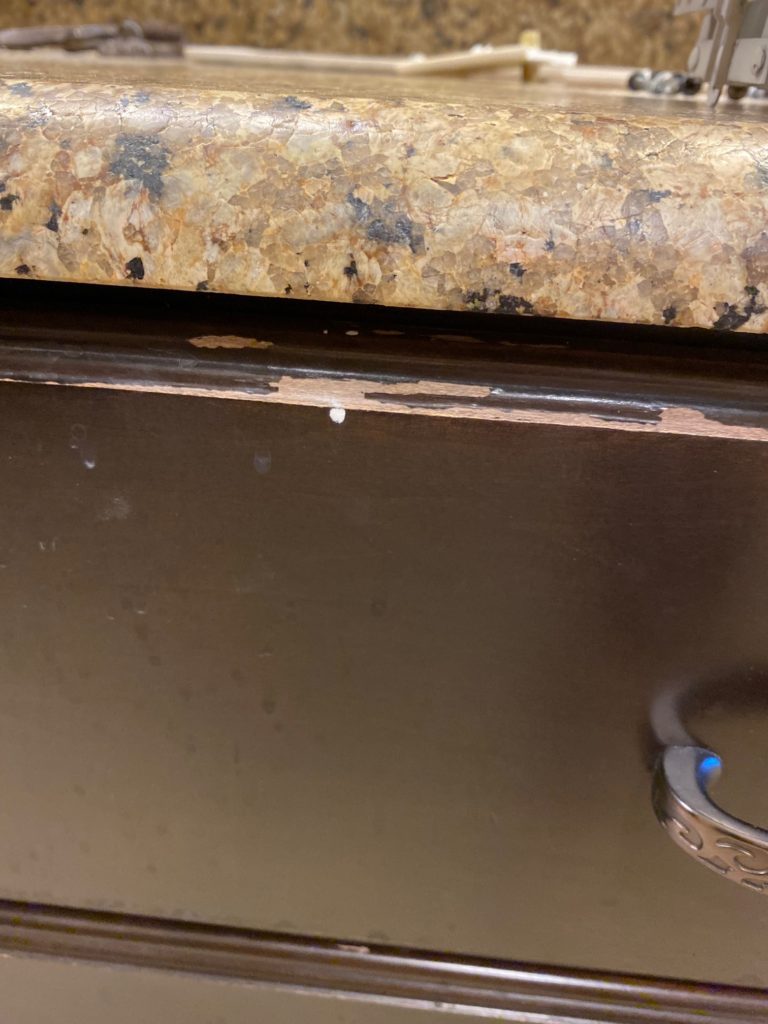
Peeling and worn cabinets can be painted for a refresh
Sand the old and worn cabinets first before painting
BEFORE
AFTER
Update Lighting (without an electrician)
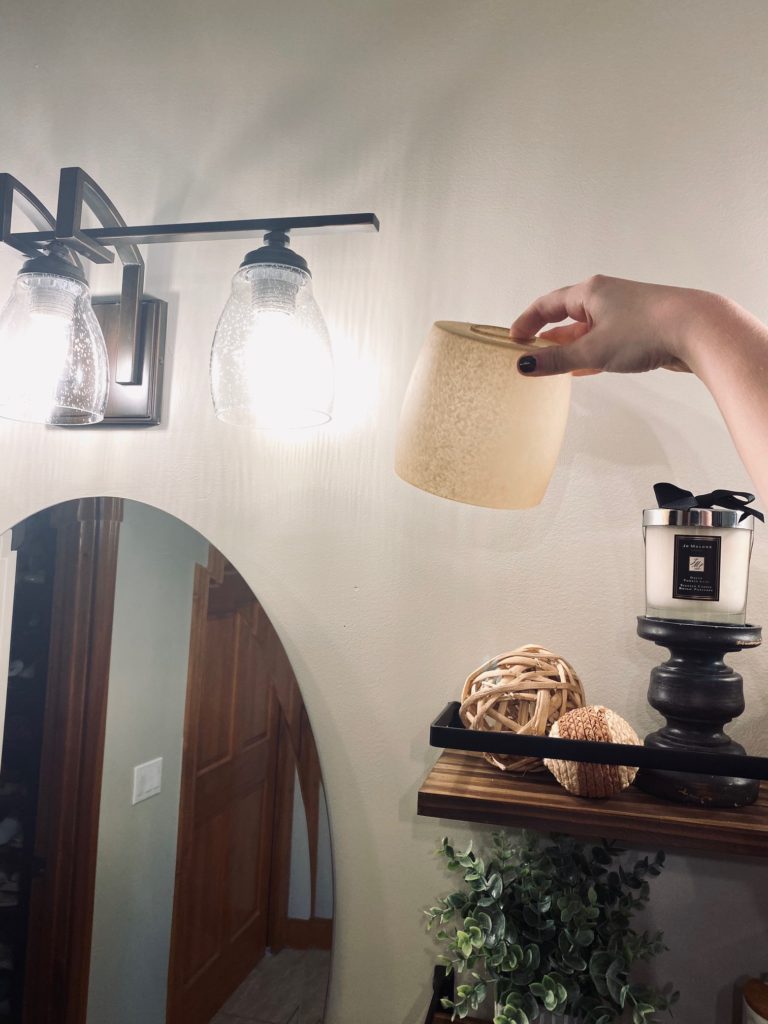
No need to replace light fixtures. Just replace the shades. They are all interchangeable! Replacement shades come in many different shapes, colors and sizes. For $6 each I swapped out all the light shades on the two over the mirror lights, the chandelier and the pendant light over the tub. What a HUGE upgrade to the exact same light fixtures! For a tutorial on how to swap out shades, check out my blog tutorial HERE. If you really want to go the extra step, you could paint your existing light fixtures. I left mine their original oil rubbed bronze color.
Swap out shades for a quick and easy DIY update
Update to modern shades for new look (old shade on left)
Changing shade requires no electrician (old shade on right)
Hardware
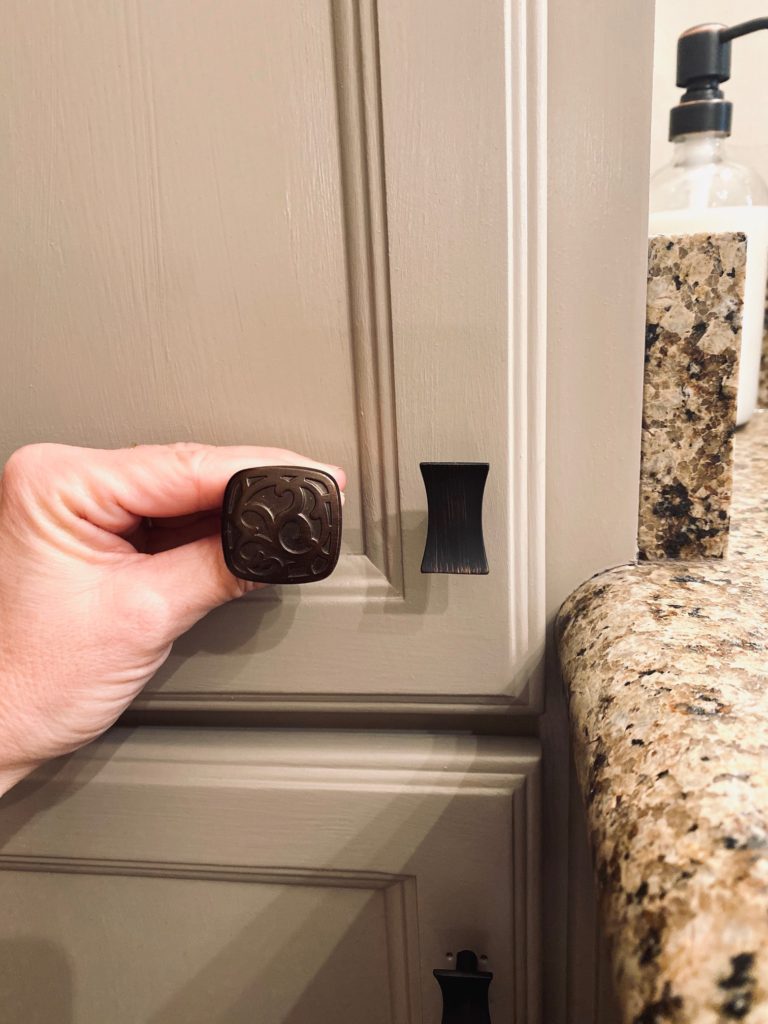
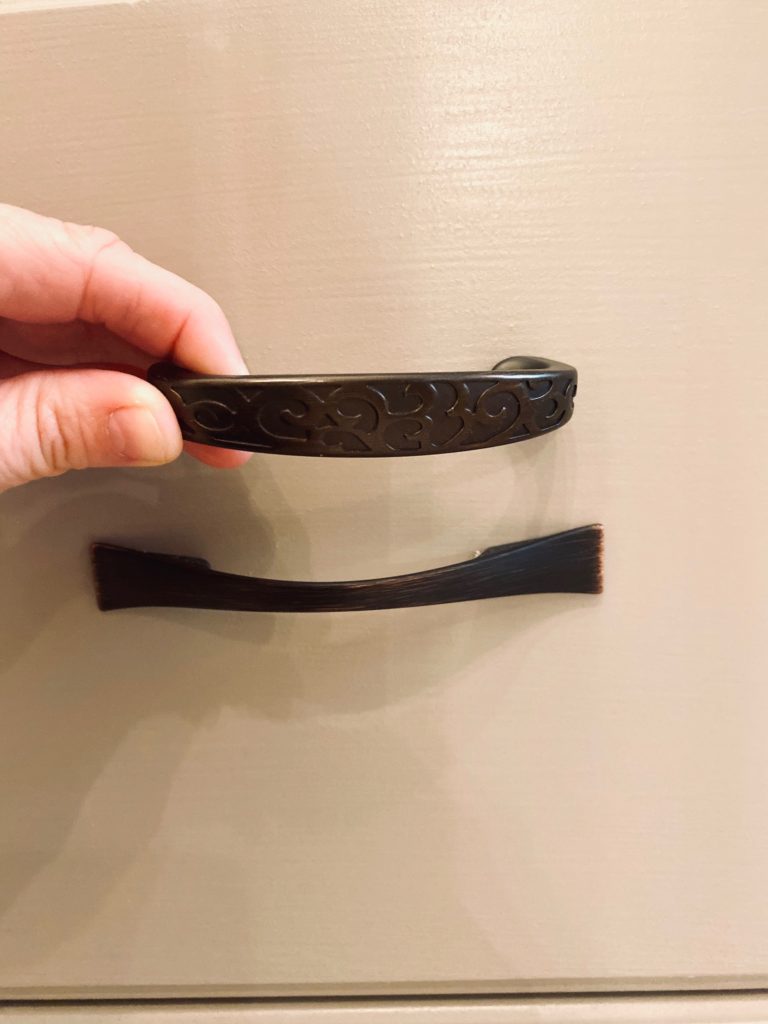
Big impact for little investment is swapping out hardware. I was able to find all the replacement knobs and handles for .99 cents each on clearance at a home store. Many current styles and colors are available and are reasonably priced.
Old outdated pull on left. Modern pull on right.
Old handle top and new handle on bottom
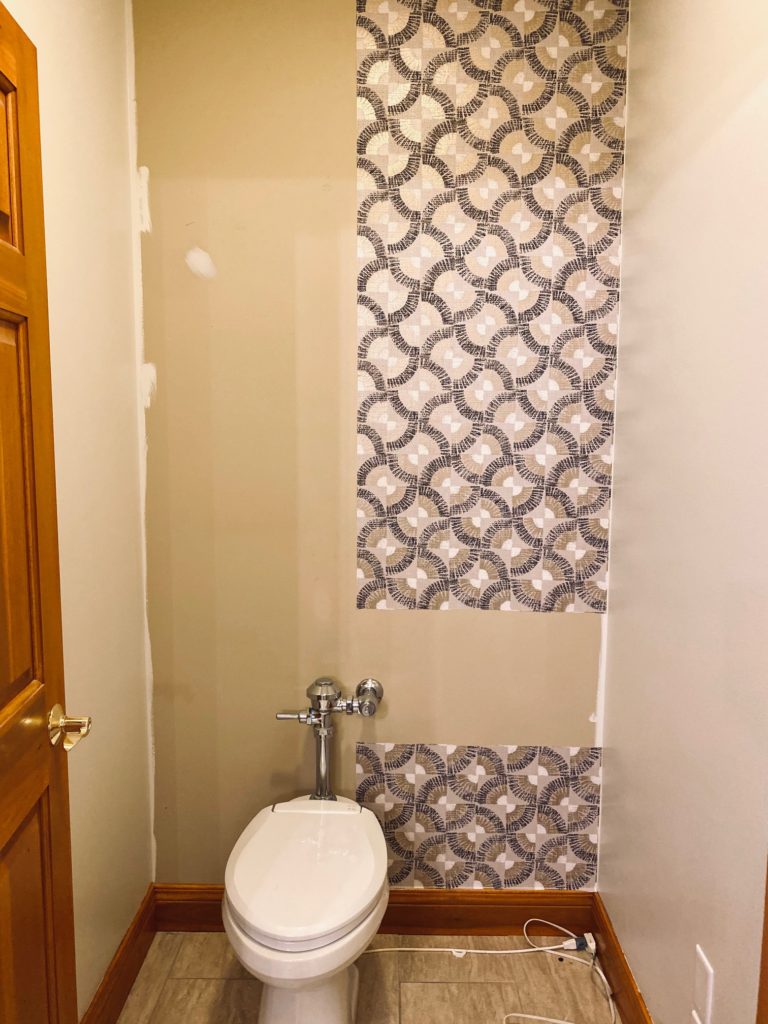
Temporary Wallpaper
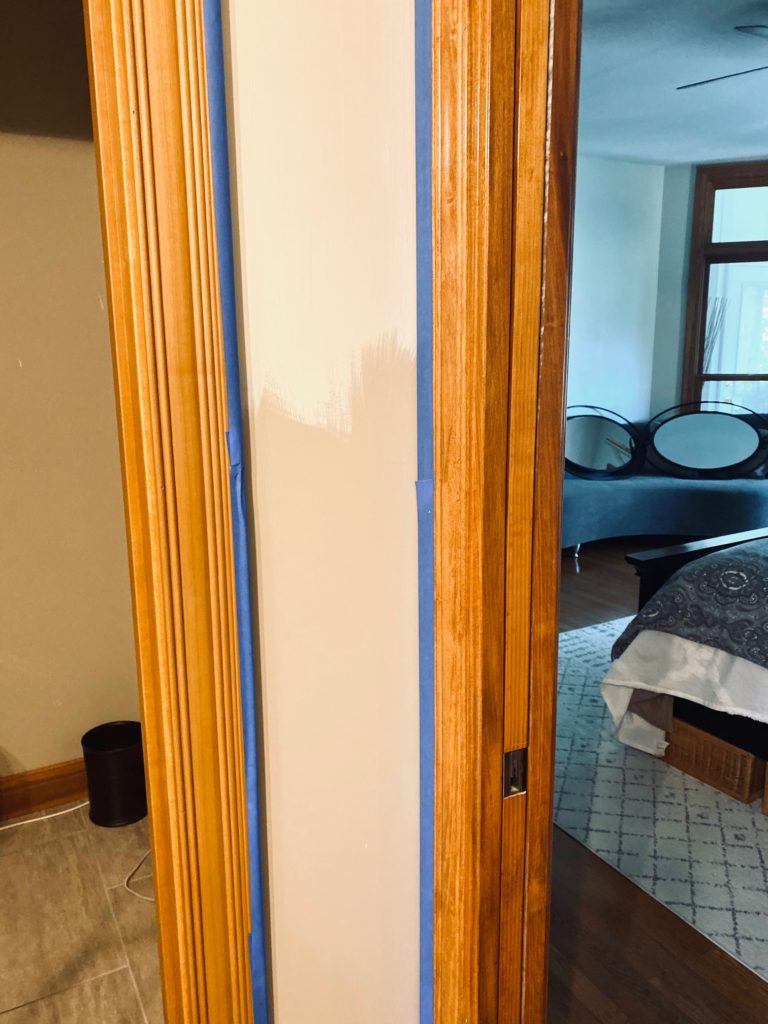
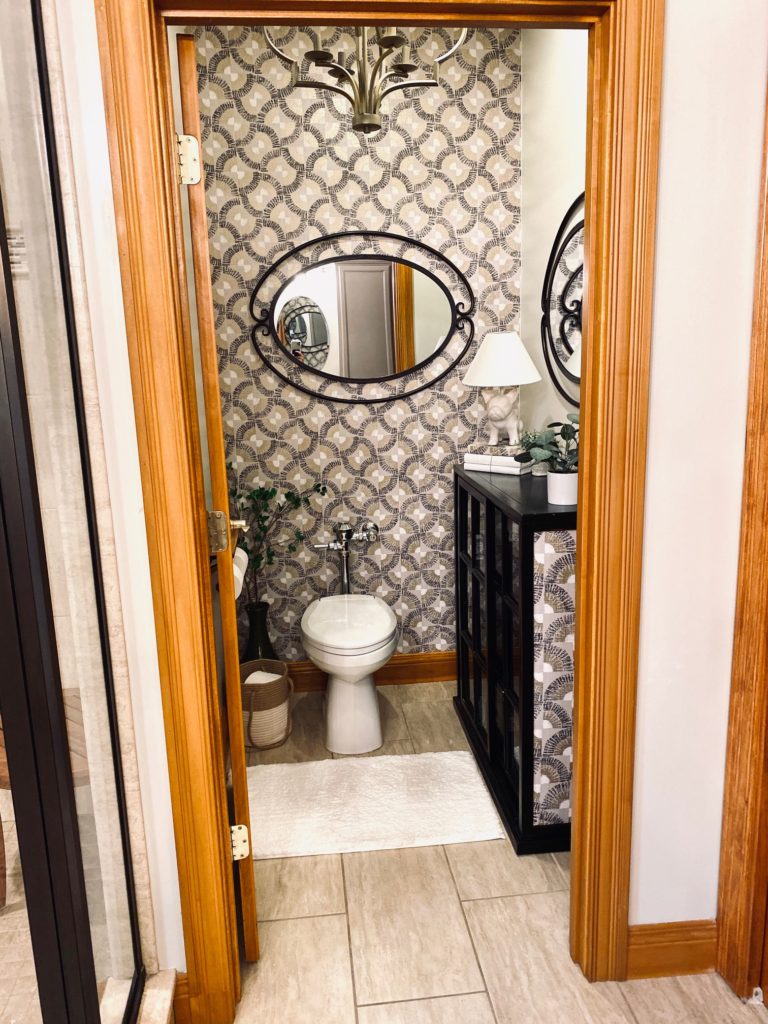
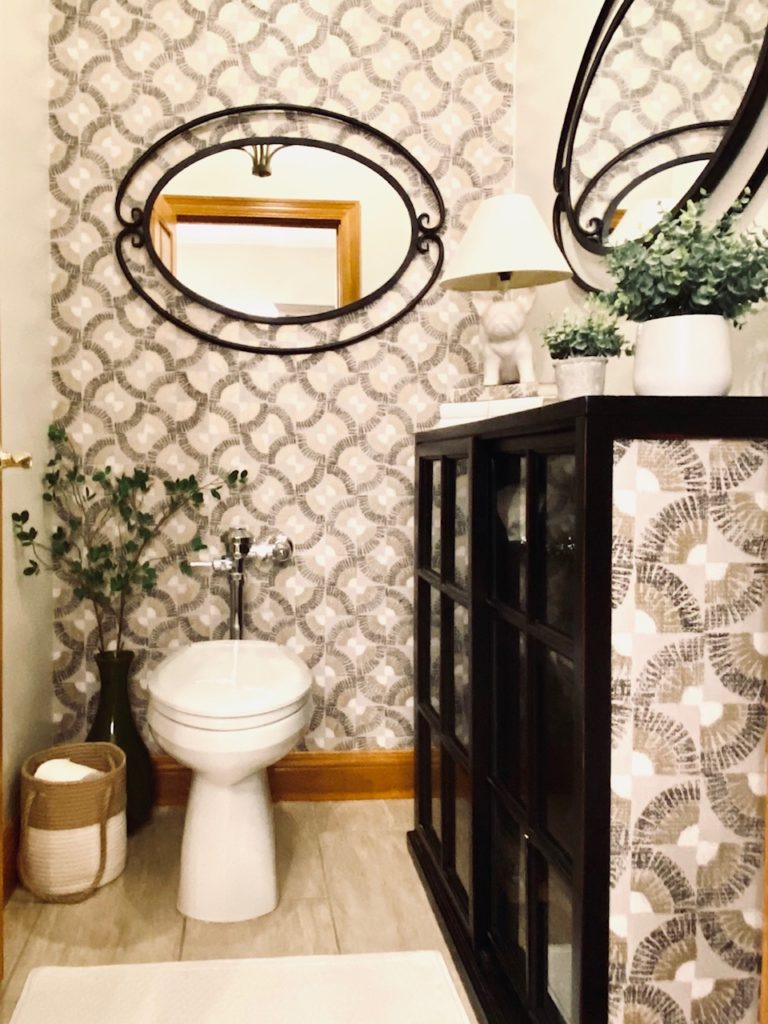
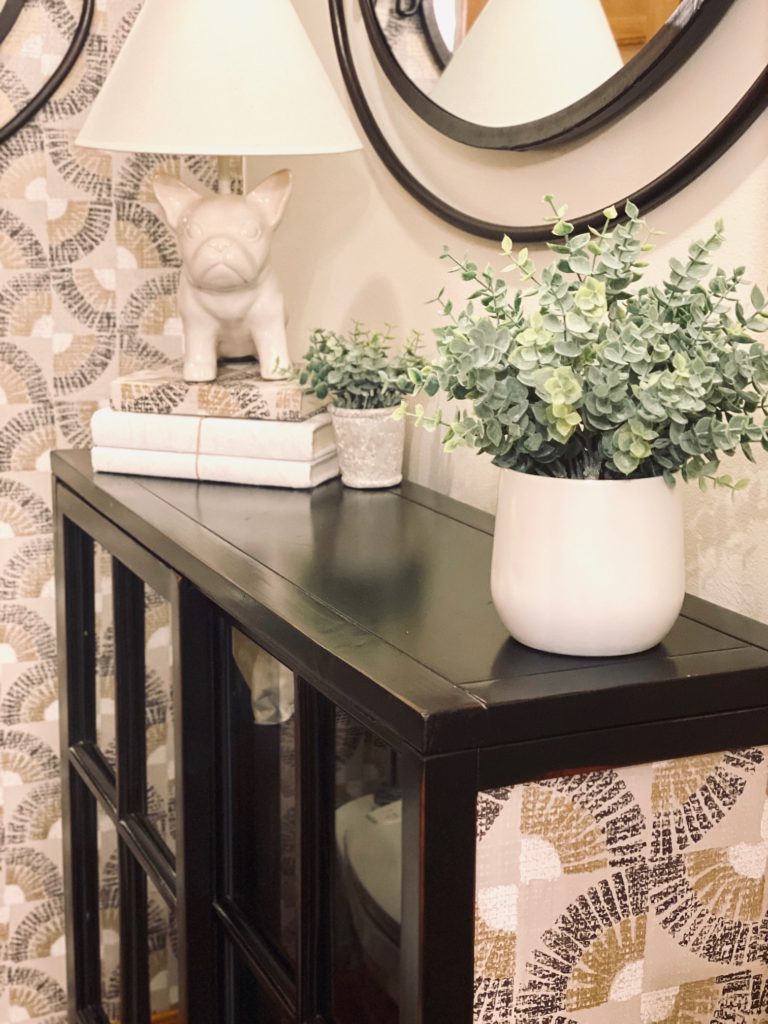
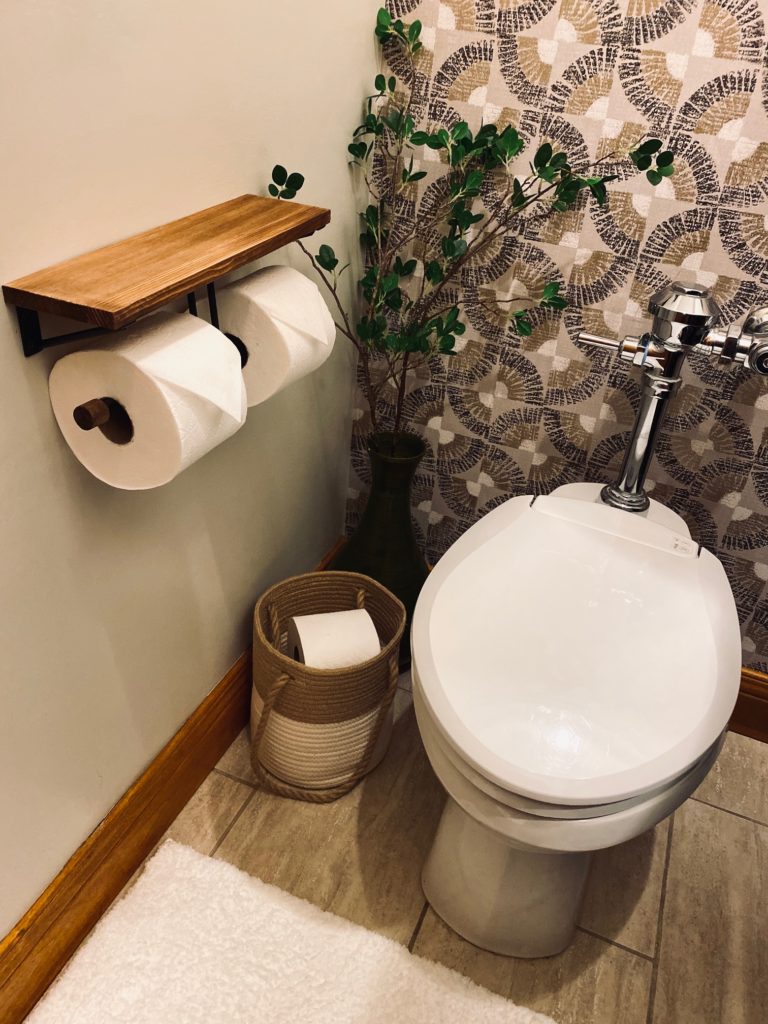
An easy DIY update is to add an accent wall of temporary wallpaper to the space. Self adhesive backed wallpaper comes in hundreds of different colors and designs. It’s easy to install (check out my blog HERE on how I installed temporary wallpaper in my master bedroom HERE). It is easy to install and remove if you decide you don’t like it. I added temporary wallpaper to the toilet room to add an element of design and color to the space. Not only did I wallpaper one of the walls for accent, I also covered the end of my cabinet and a book for decor!
Temporary wallpaper comes in many colors and patterns
Installing temporary wallpaper is an easy DIY project
BEFORE TEMPORARY WALLPAPER
AFTER TEMPORARY WALLPAPER
Decorate with Purpose
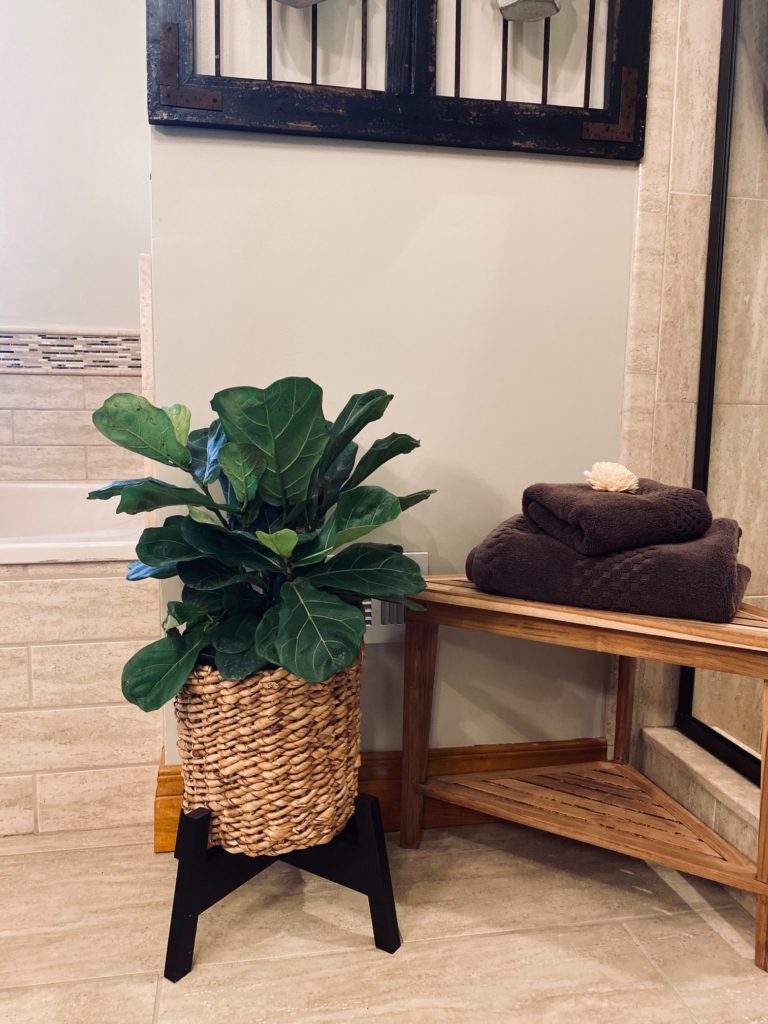
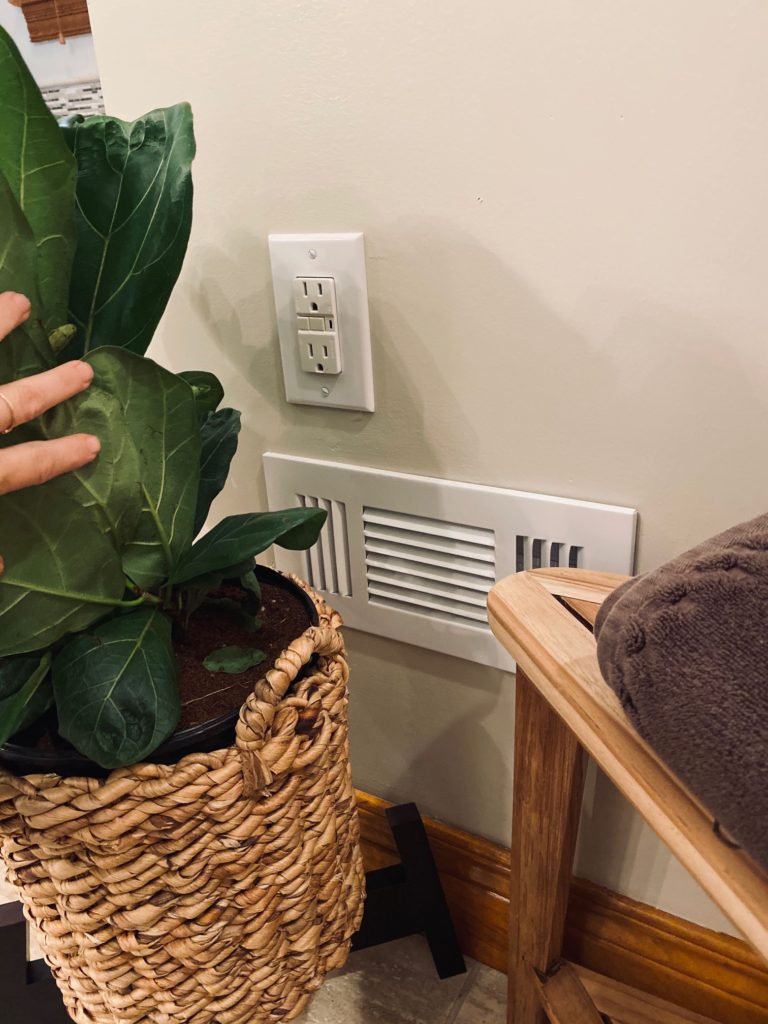
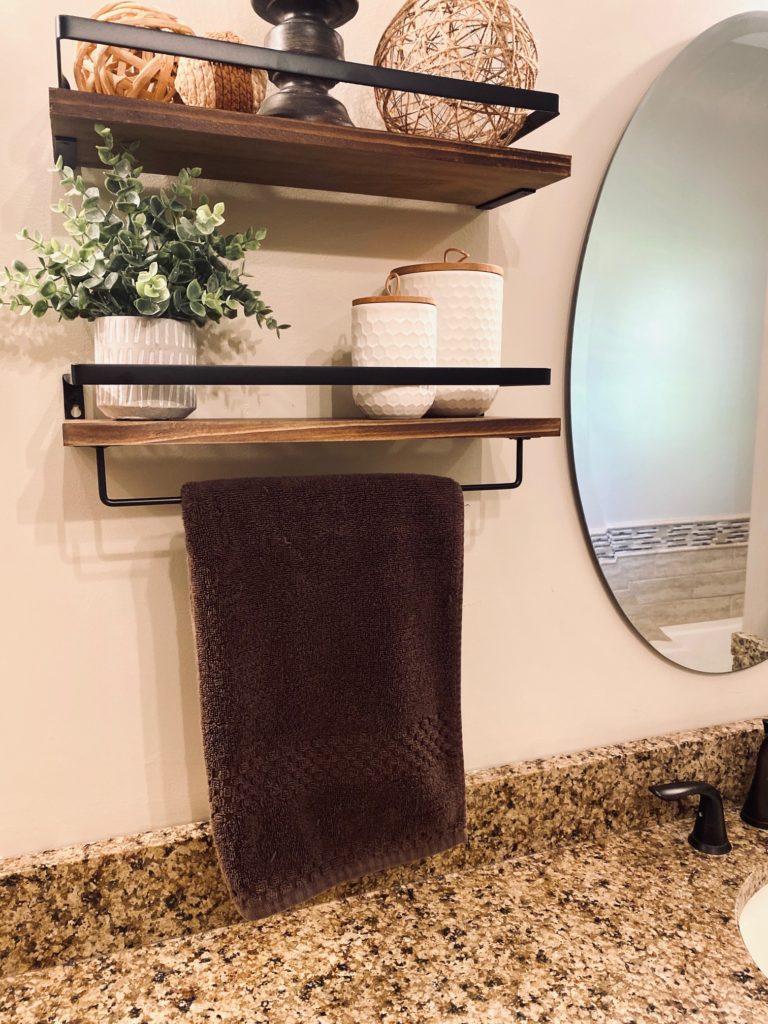
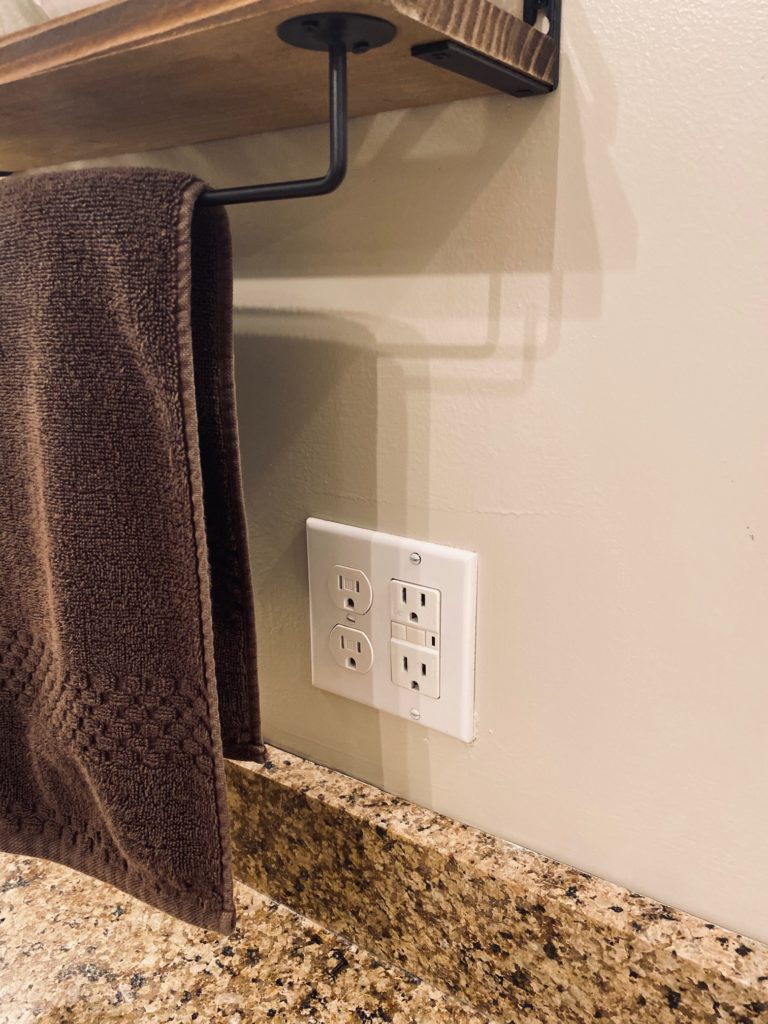
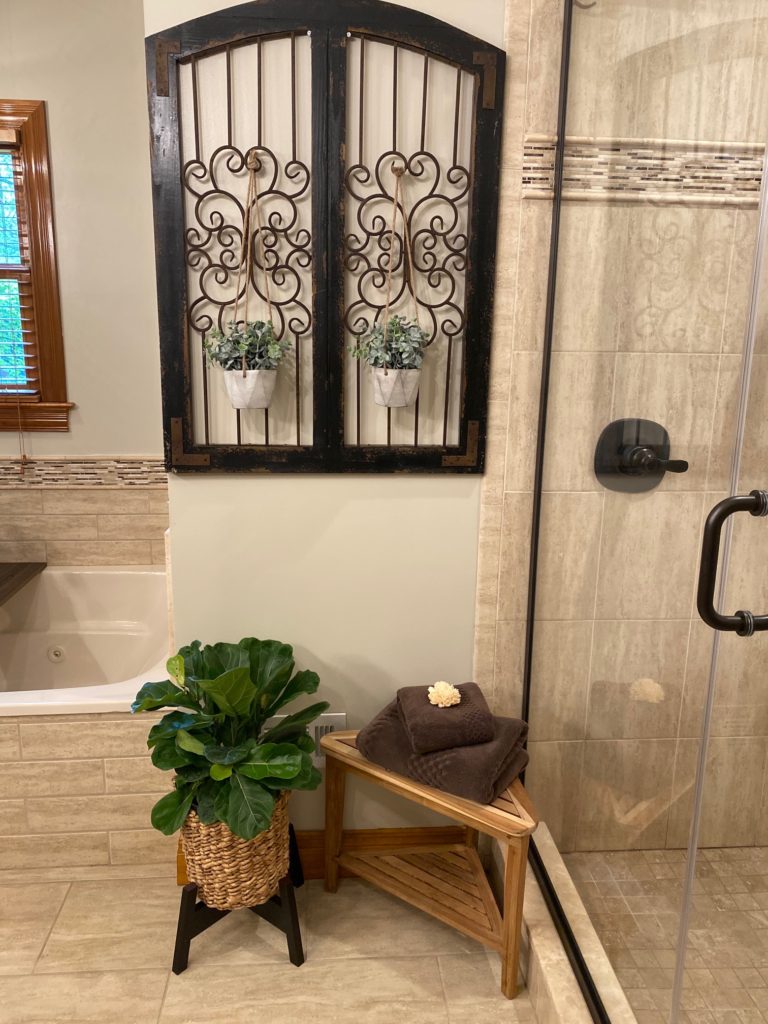
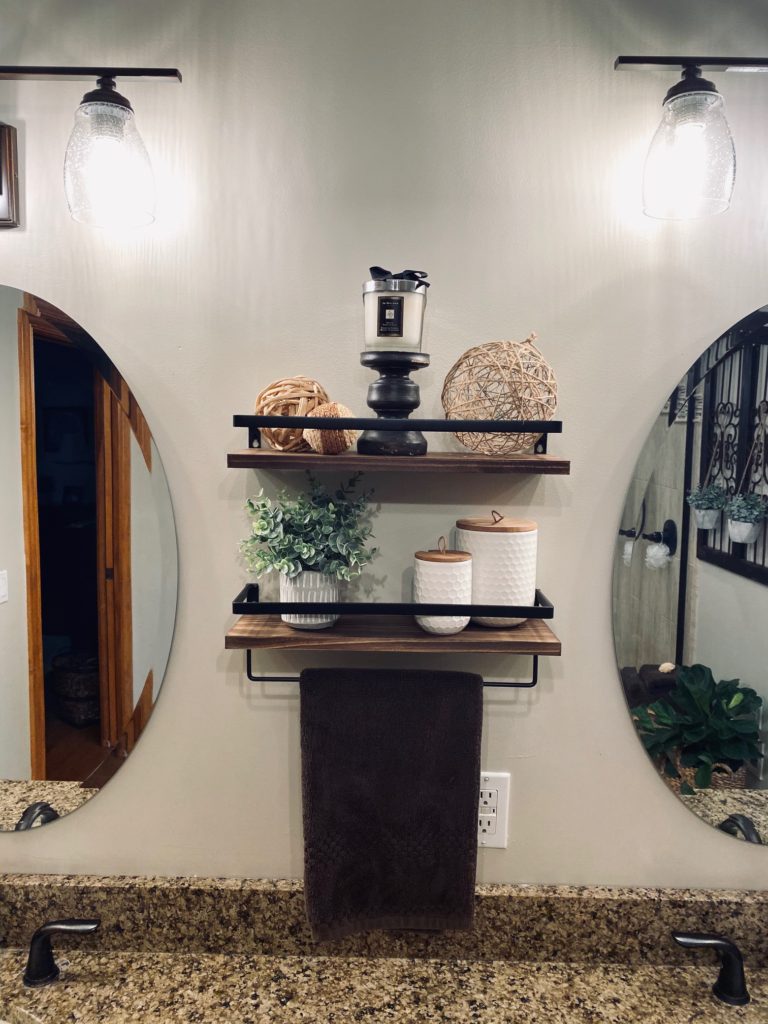
When decorating look around the room first. Is there an outlet, vent or unsightly obstacle noticeably present in the room? Decorate with purpose to hide, conceal or camouflage any unsightly elements in the space. It is amazing how a faux plant or picture can hide or take your eye away from unwanted sights.
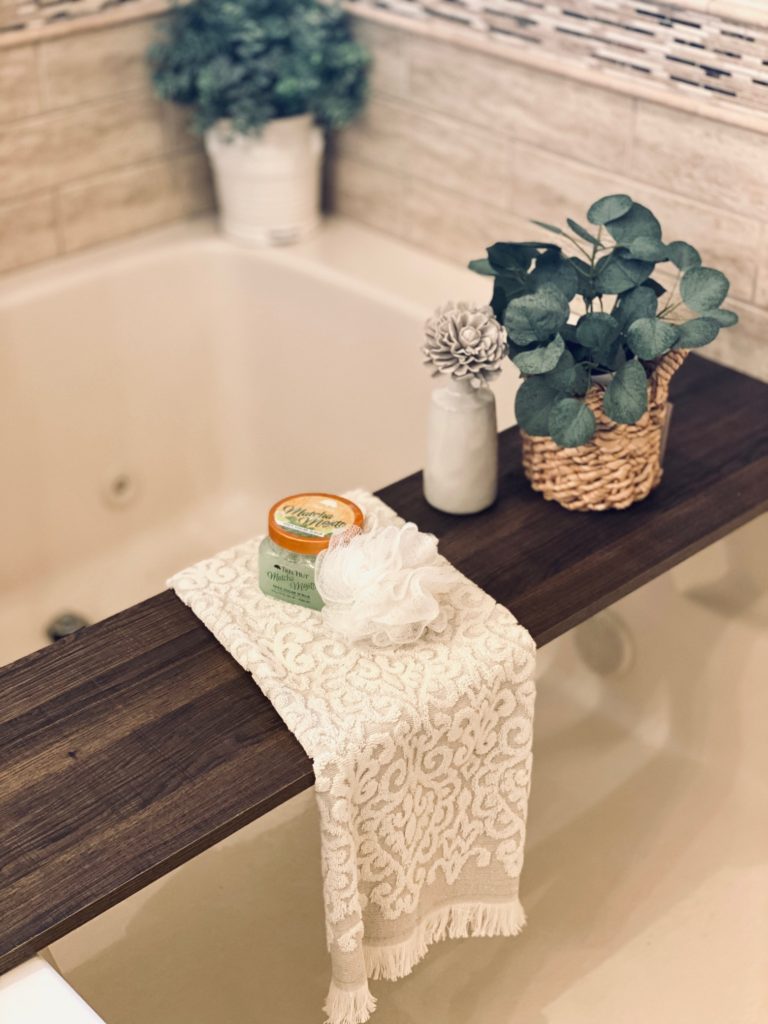
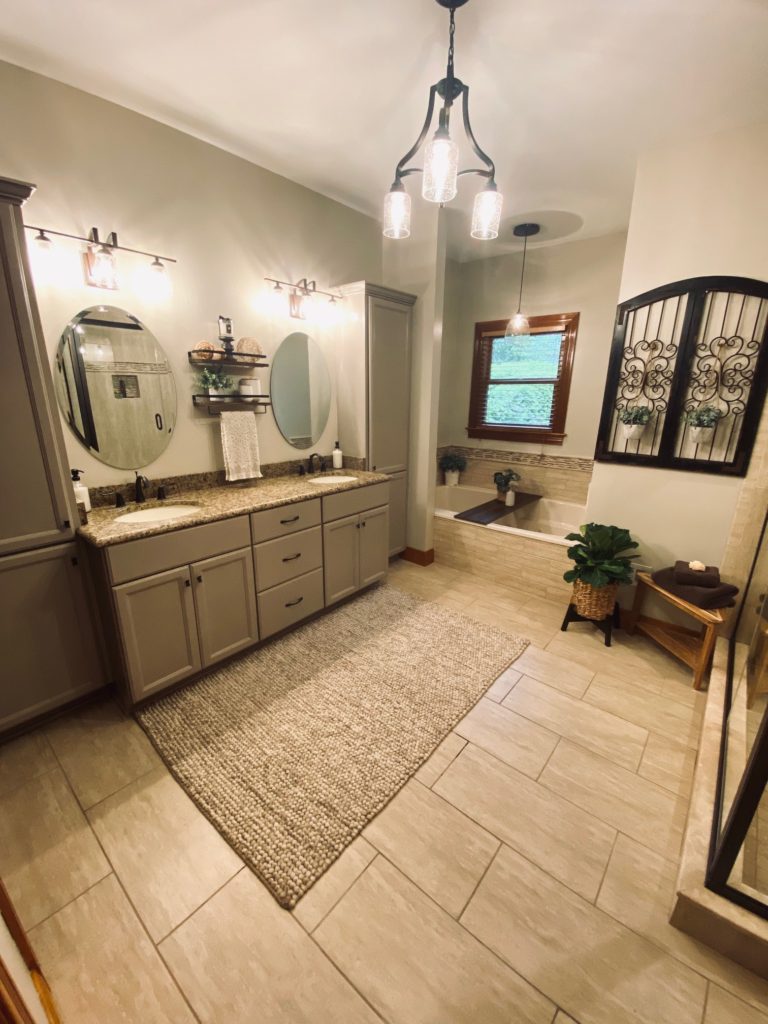
Allow decor to have purpose. For instance this shelf decor not only holds a few decorative items and a hand towel, it also hides an unsightly outlet on the wall. Also, the corner table and plant in a stand is staged purposefully to camouflage an outlet and vent on the wall.
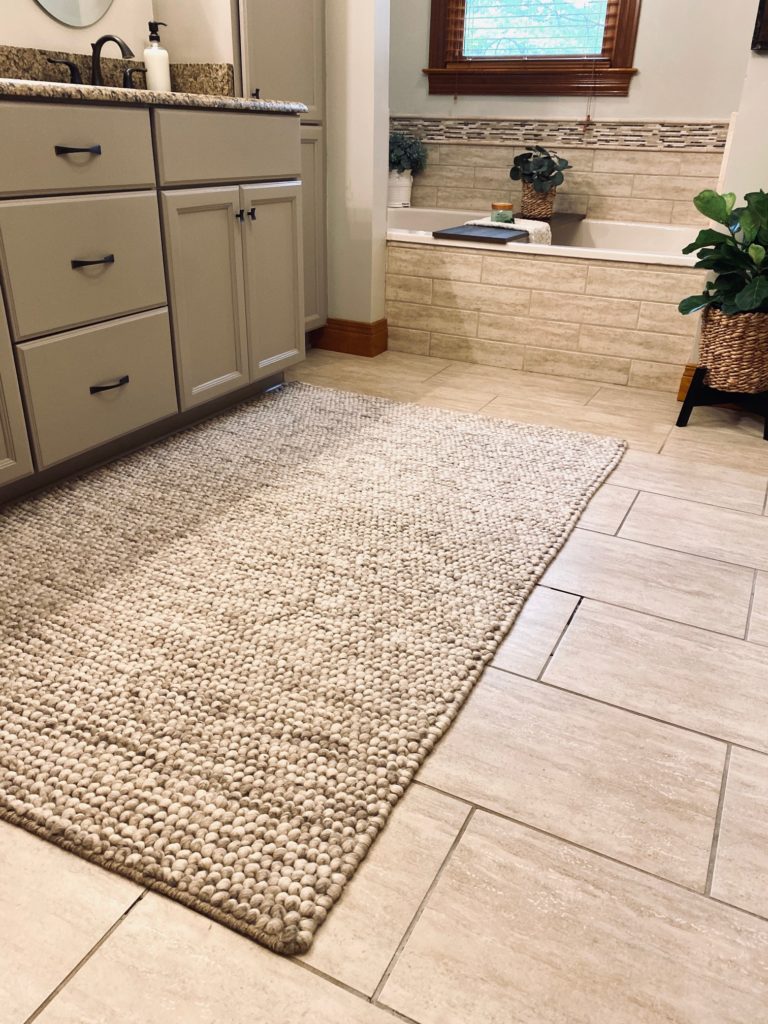
Rugs
One of the few things I purchased for this space was a new rug. Rugs are great pieces to “ground” an entire room. A meaningful colored rug can be the conduit between decor style, room colors and overall feel of the room. A rug can also be used to cover up an old floor that you don’t like and want to hide. In my bathroom, the grout in the tiles are starting deteriorate and chunks are missing. This is a ppoblem that will eventually need to be fixed with new grout. For now, the rug hides the missing grout problem areas until we can get that fixed.
Re-purpose, Reuse and Recycle
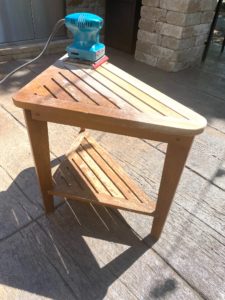
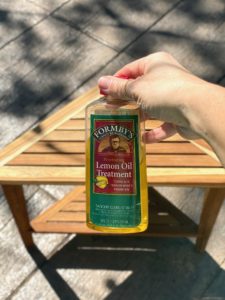
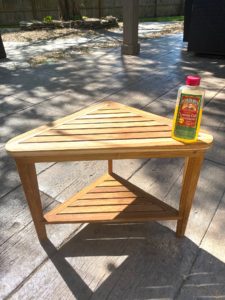
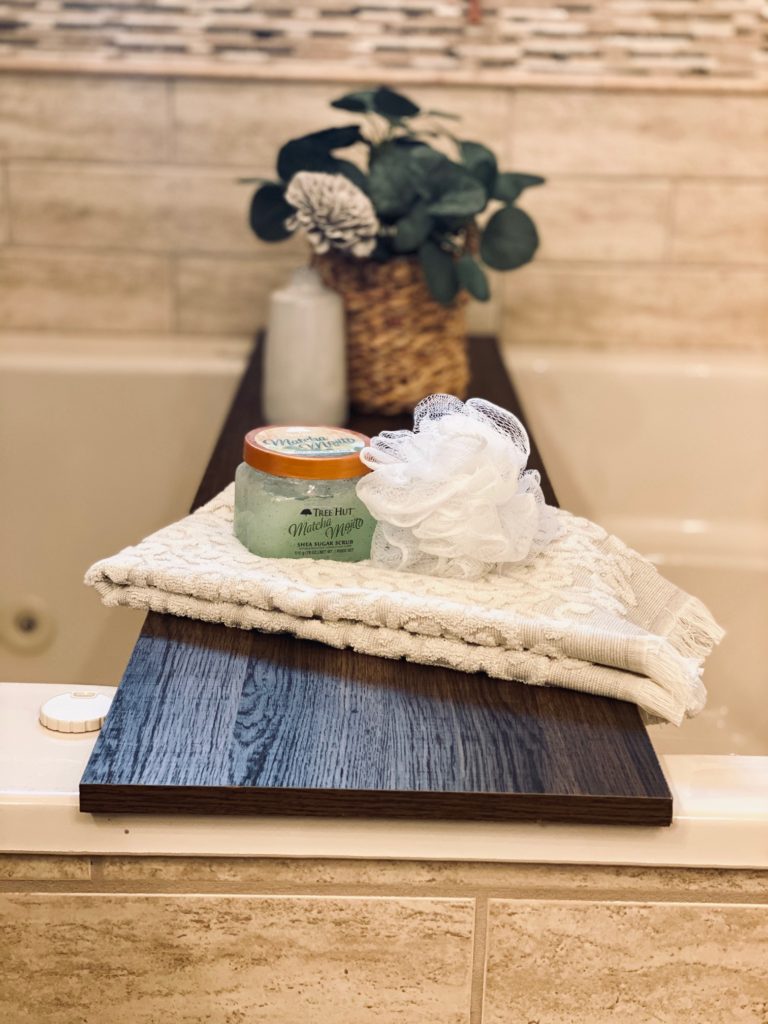
I always shop my home for decor when I’m updating a space. It is common to “borrow” decor from other tired areas of the home. Sometimes the exact same candlestick looks much better used in a different setting. Also, if existing decor is tired then figure out ways to give it a face lift. Check out what I did with this shower seat. It was peeling and damaged. With a little TLC, some light sanding and wood oil it looks as good as new. It is now reused in a new area of the bathroom as decor with purpose! Another recycle in the space is this 4ft shelf that now serves as a tub caddie!
Use hand sander to clean up old and peeling finish
Once sanded remove dust with a wet cloth
Use lemon oil to clean and replace natural wood oils
No staining, no mess easy DIY table refinish!
DIY on a Dime
You can update any space on the cheap if you are willing to pull up your sleeves and get a little paint in your hair (or a lot when you accidentally dip your long hair in a paint tray – that may or may not have happened….twice). By working with what you have, throw in a little creativity and well placed decor you can update your master bath on a dime. This master bath transformation cost less than $500 and took two weekends to complete by myself. Make it three weekends if you count how long it took me to write this blog. Ha Ha.